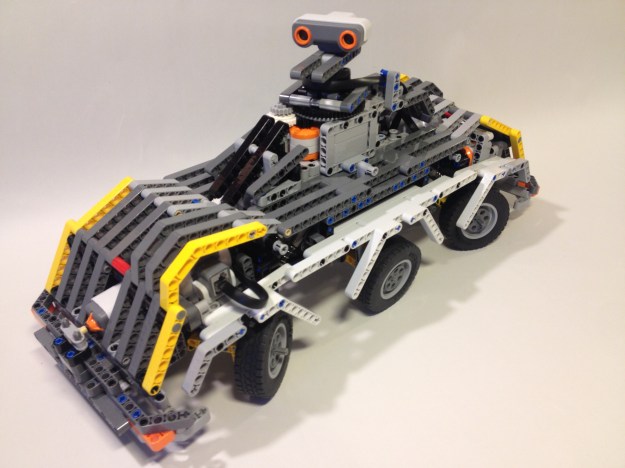
Proud to present : a 6x6x4 robot vehicle, even though it needs programming
 (More pictures below and at the very end of this page, LDD file here.)
Introduction
This is my first big MOC after my ‘dark years’ to get myself acquainted with the Technic Lego of the 2010s. I tried to build it out of a Mark II mobile crane and a Mindstorms EV2 set. That didn’t work out completely: you’ll need additional parts as you will see below.
One disclaimer: the robot has no program to run it. Because it steers like a car, i.e. it can not turn on the spot but has a turn radius, I don’t think it is easy to write a program that takes that into account. Since I spend much of my job programming, I do not feel like doing even more of that if I can also spend my time building Lego. So, I am looking for volunteers.
Version history
Version 1 of this design was published on March 12, 2017. It had a major problem with the propulsion. The machine hardly moved.
Version 1.1, published on 9 April 2017, has the propulsion problem solved. It also has a better locking mechanism to align the steering wheels during the building phase. Thirdly, there was a glitch in the steering mechanism that prevented the steering wheels from turning as far as they could.
Concept
It wasn’t really the idea from the start, but hey, things happen and I found out the design turned into some kind of ‘all terrain’ driving robot. Six wheels instead of four seemed kind-of cool and better able to conquer holes and obstacles. Then, since I happened to have a Mindstorms set, the engine and controls had to come from a computer rather than remote-control. The Mindstorms set includes an ultrasound distance meter, which allows the robot to ‘see’ it’s surroundings, et voila, there is a concept.
Features

6 Propelled, independently running wheels, hence 6×6. 4 Steering wheels, hence x4 (picture of v1)

Distance-sensing turret does 360º turns.

The flexible jacket can be removed in a couple of minutes. (Older version shown here)

Bumper sensors to detect collisions with objects on the floor

Suspension on all wheels or segments
Some more details
Specifications
Dimensions:
length 57 x width 25 x height 27 studs (approximately)
Weight (v1):
1911 gram, including jacket and batteries. Weight of the jacket is 335 grams.
Number of parts (v1):
1353 according to LDD
Built from:
• Mobile crane Mk II (42009)
• Mindstorms NXT 2.0 (8547)
Plus additional parts:
• 14 Shock Absorber 6.5L, (I took 4 from the Car Chassis (8860) and ordered 10 more of the medium-strength type, which I believe are the same as those from the Car Chassis)
• 4 Small technic turntables
• 2 Differentials (part 62821b in BrickLink)
• 8 Universal joints (part 62520c01 in BL)
• 1 Pin without friction (part 3673 in BL)
I may have overlooked some additional parts, but these are the most important ones. Please do let me know if you discover any omissions.
Building instructions
Download the LDD file here. This MOC is also on Rebrickable.
I should warn you though that it may not be an easy ride. I never tried generating the instructions for the entire robot, but when I tried only the jacket, the logic of LDD was not too great. The best way to build it is from side to side instead of from end to end as LDD suggested.
So, if that relatively simple part of the design is difficult for LDD, then the front and back modules may not come out easy either since they are very dense.
As you can probably see, the design in outline consists of three modules, the jacket and the turret. In the LDD file, I made some of the bricks in bright colors which is only to highlight them since they are important for different reasons.
• Most of them, in bright pink, keep the jacket in place.
• Then there are 12 ‘3L pins with stop bush’ (also in bright pink) that keep the front and back module in place. They are not very easy to reach (you’ll probably need the Lego building tool) but they are still the easiest way to disassemble the main modules
• There are two groups of parts in bright pink that you need during the building to keep the steering wheels straight. The steering mechanisms need to be exactly in sync, so you need to be careful to have the gears and axes nicely aligned. These parts help you do that and help to keep the wheels steady when you assemble the three modules together.
• There are two axes that according to LDD can not be where they should be but they definitely can. The two axes are now floating next to the robot. They go in the front windshield where the bright green piece is. In real, that piece is black.
• The centre module contains four bright green pins. They hold the wheels that guide the electrical wires. However, the LDD library does not contain the wheels, so the tires are also floating outside the vehicle.
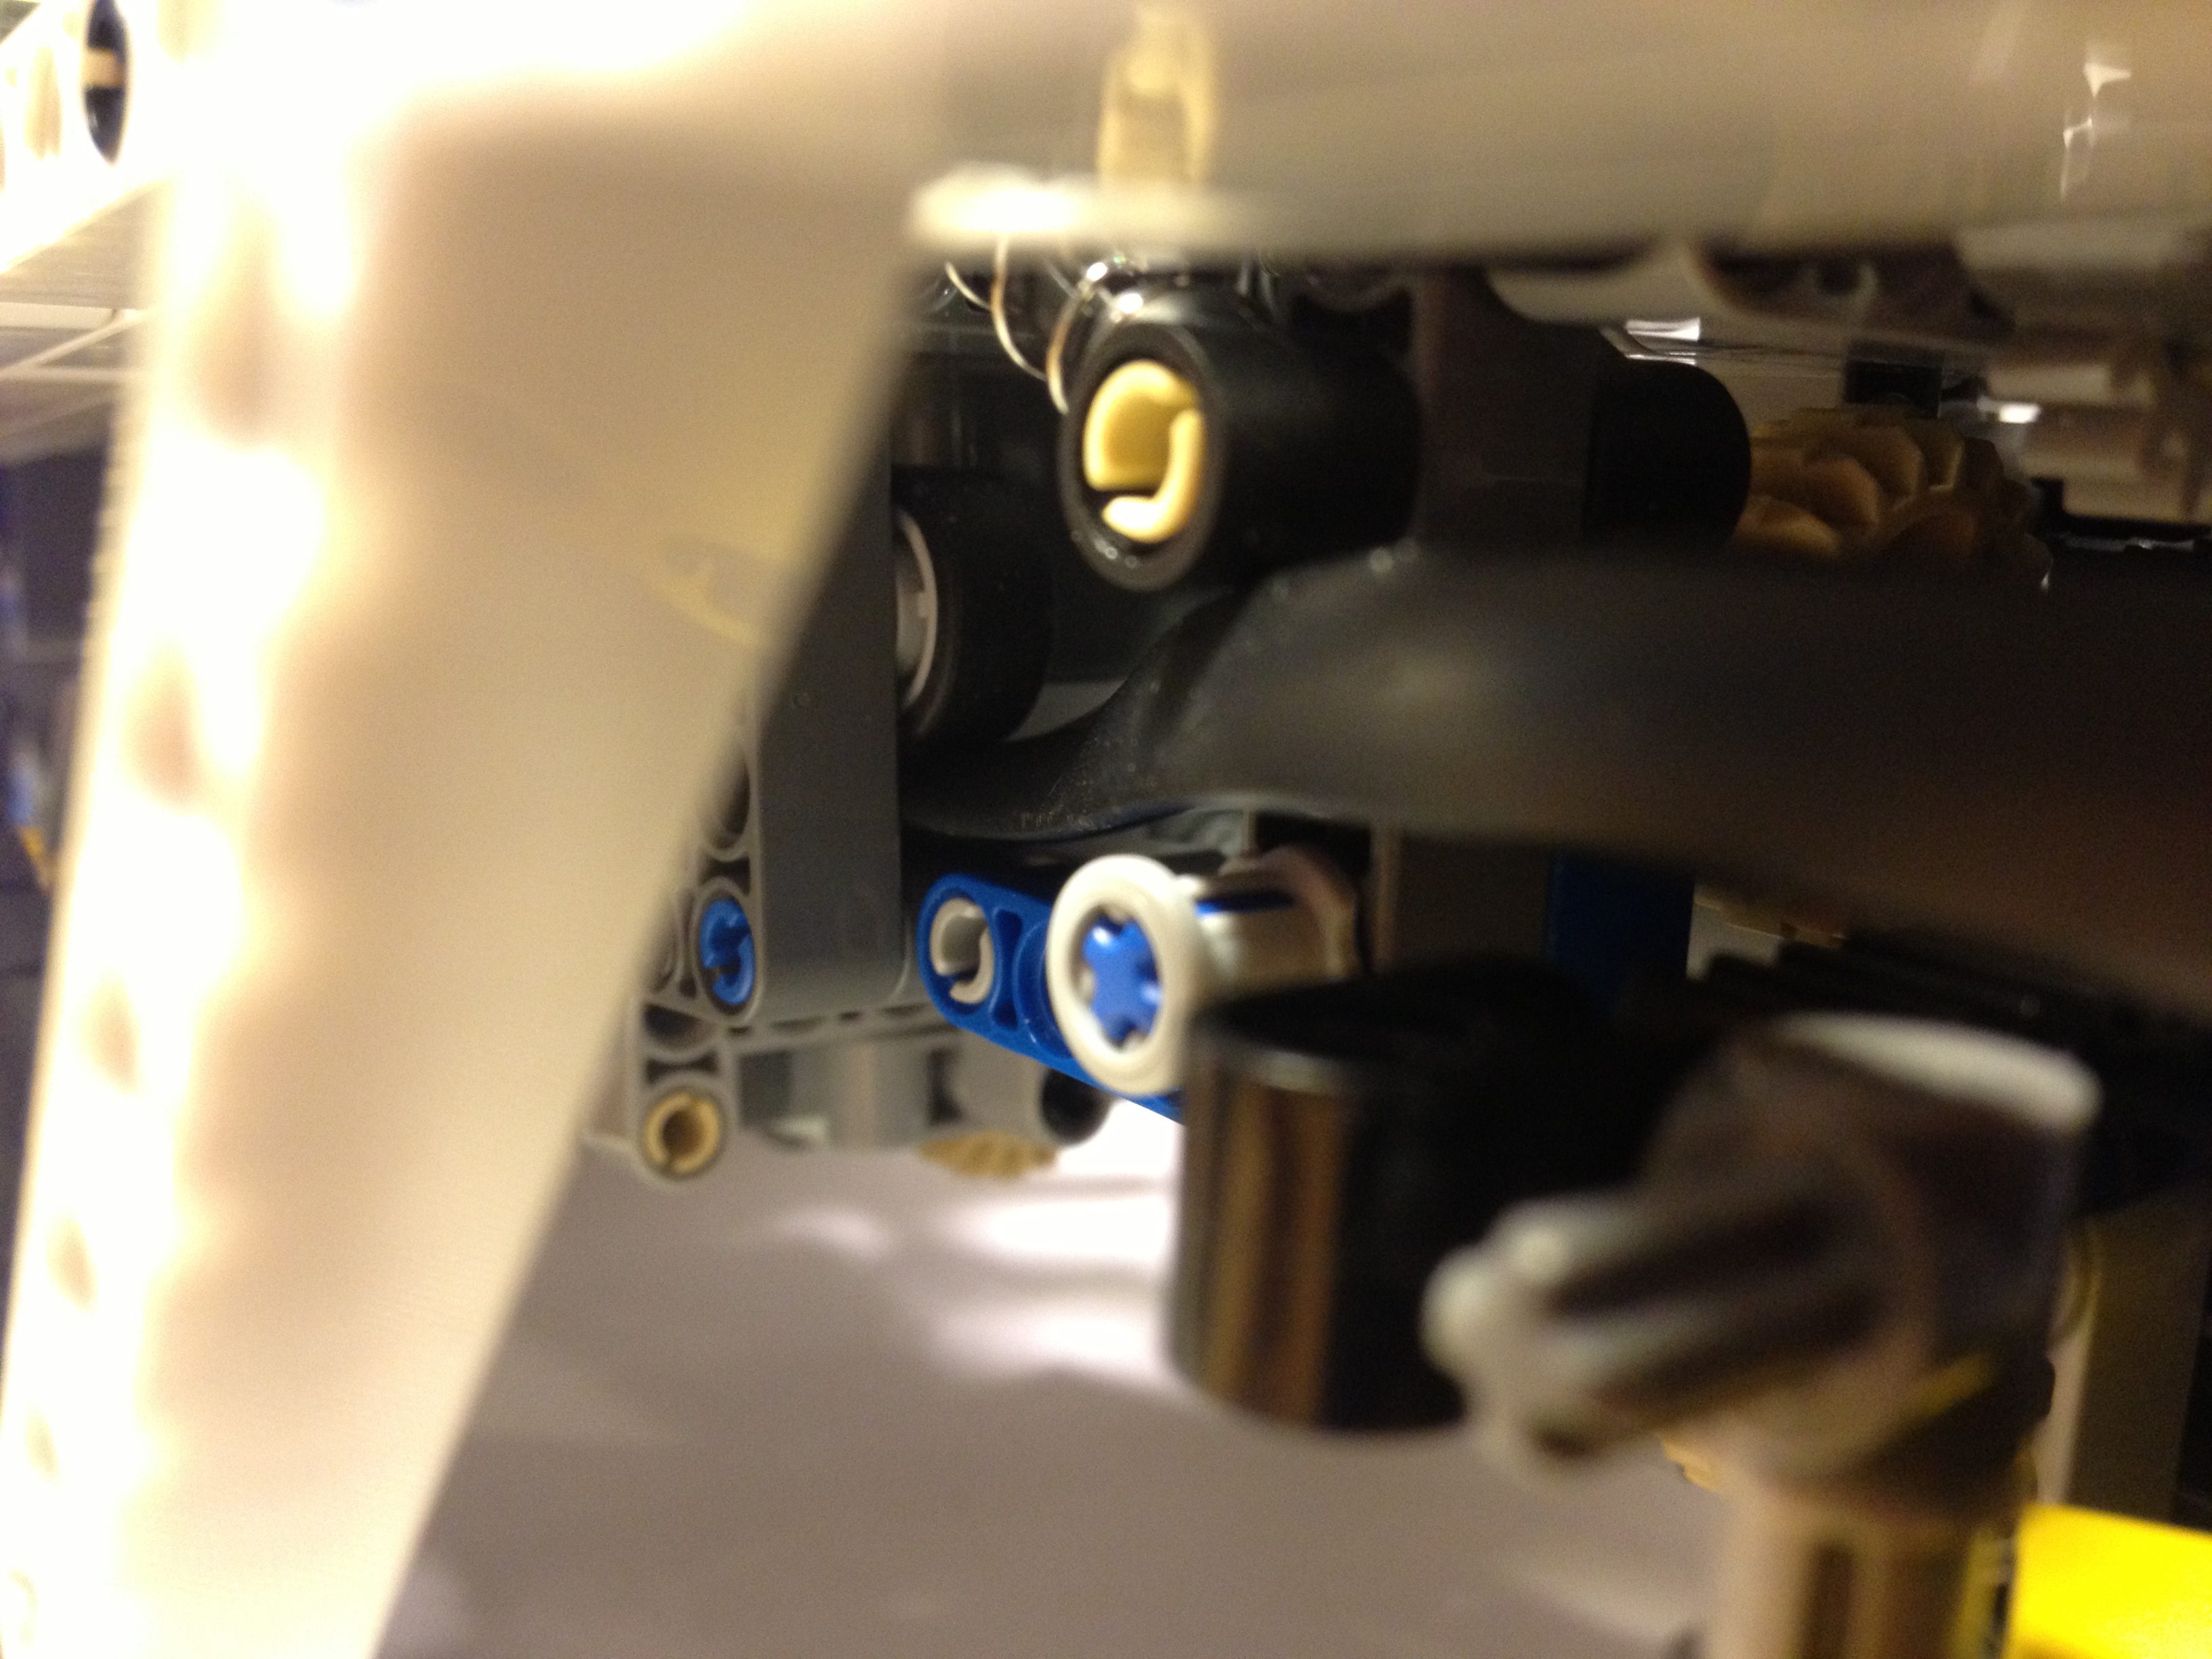
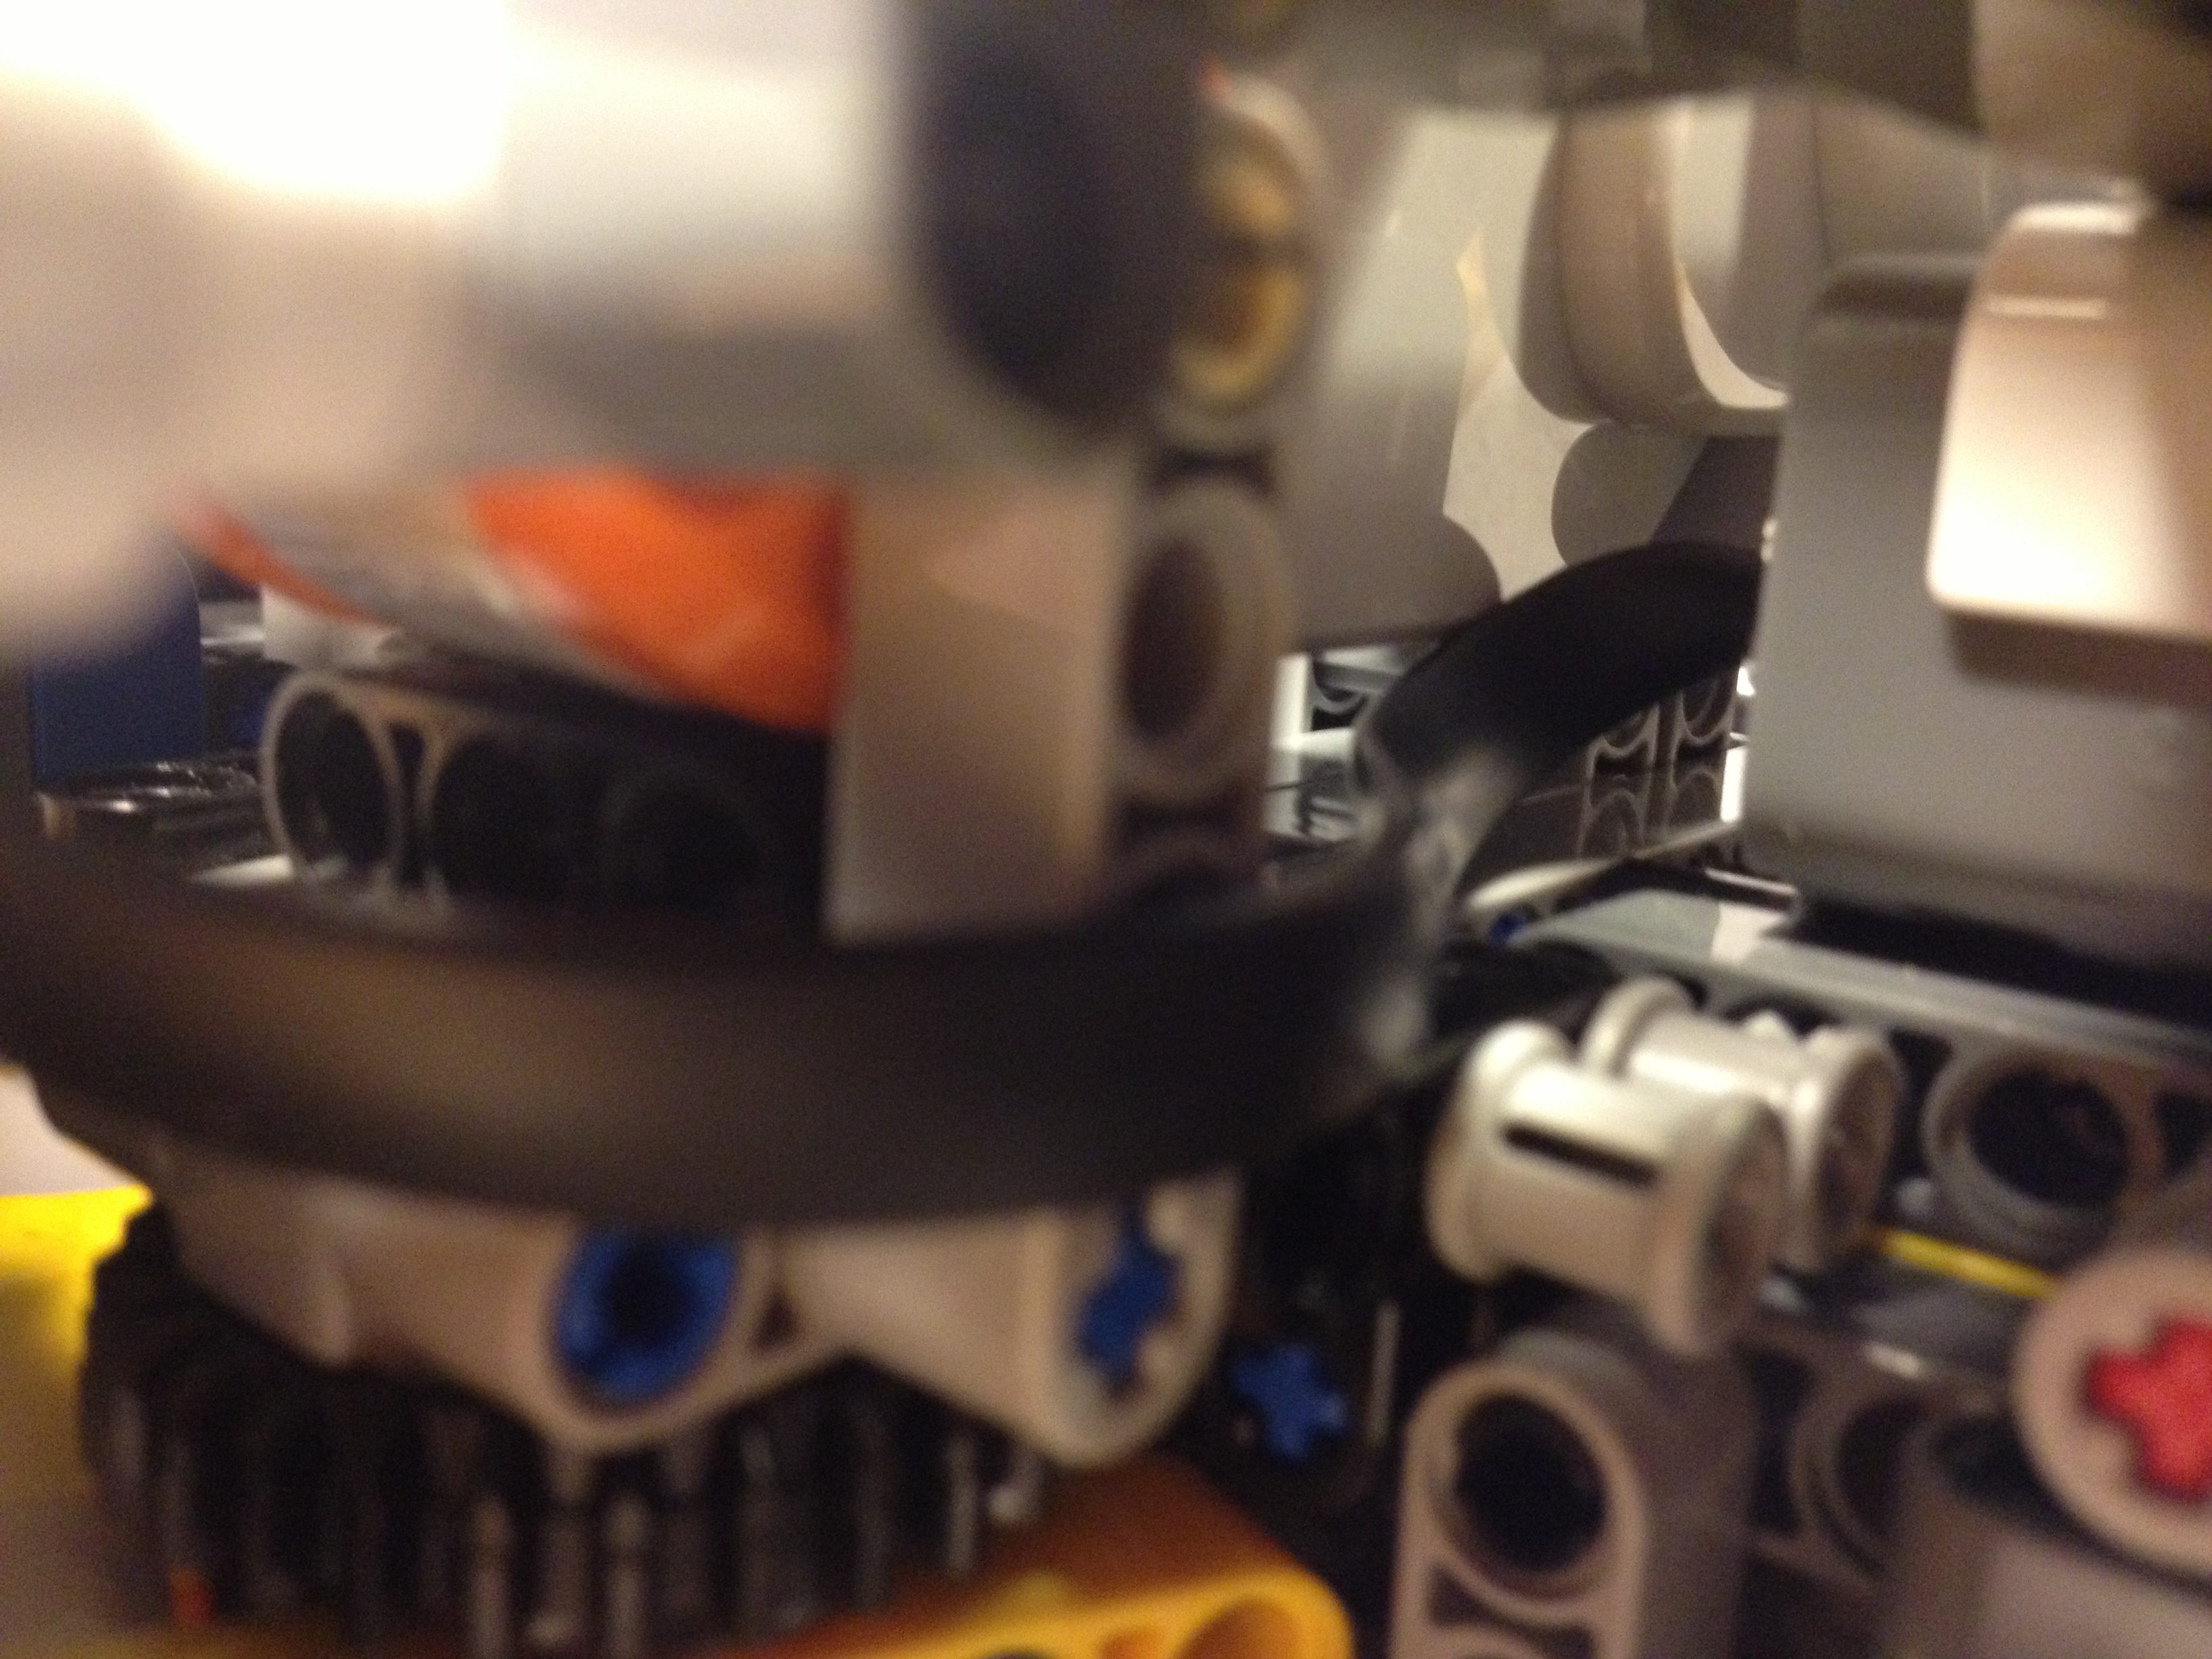
The LDD does not allow to show how the electrical cables run through the design, well except for which length and where the beginning and endpoints are. The photos above may help figuring out how they run. The photos here show details of how the cables to the bumper sensors run.
-
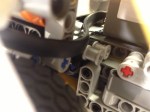
- Cable of front bumper-sensor snaking through (1)

-
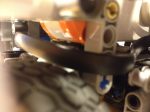
- Cable of front bumper-sensor snaking through (2)

-
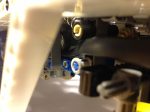
- Cable of front bumper-sensor snaking through (3)
-
- Cable of rear bumper-sensor snaking through (1)
Design flaws
Besides learning about the possibilities and sometimes impossibilities of the stud-less generation of Technic Lego, I learned a lot about the design process: the seemingly endless puzzling, design-iterations, new ideas for improvements and additions, killing not-so-good ideas, testing, debugging, etcetera. I see parallels with developing software, but all that is worth a whole different text.
For now, I will briefly discuss the major design flaws that I have discovered so far.
Engine placement and the problem of symmetry for steering
Currently, the engine on one end of the car provides the power for steering of all four wheels. However, since it is positioned at one end, there is a delay between the steering movement of the wheels on either end of the vehicle. The wheels on the steering-engine end start changing direction first and a tiny bit later the wheels on the other end start moving. I think one can see it in the top picture, but since I never tested steering while the vehicle was running, I don’t know how it affects steering behaviour. I guess that the front-end (with the steering engine) can make sharper turns than the backend, which will cause friction between the wheels and the ground and a bit of strain on the structure.
The delay is caused by transmission of power through the gears and even more through the two universal joints between the modules. If the steering engine could be placed in the middle between the two steering mechanisms, the delay would be shorter and, more importantly, symmetrical. Unfortunately, I found no elegant solution that has the engines and the Mindstorms brick in the centre module. They would have to be stacked to form a tower in the middle which will move the centre of gravity will upwards. Perhaps it may still work, but it looks weird. I considered having the engines in the middle and the Mindstorms brick on one of the end modules, but that would be too asymmetrical.
The one work-around that I see, is that it means that steering while the vehicle moves in one direction works slightly different from when it moves in the other direction. One can take this into account in the robots programming. In the top picture, the distance sensor looks in the direction of the steering engine, which makes that the front of the vehicle.
Too inaccessible
One inconvenience of my attempts to make a strong car is that everything gets so bolted that some parts are difficult to build and to take it apart. That’s mostly un-handy for when you want to make changes to the design. If you’re interested in building it without trying different solutions then you can live with that, I guess. When I got tired of again taking away an end-module for the tenth time, I discovered that it was relatively easy to introduce some changes to make that easier. These are the 12 bright-pink ‘3L pins with stop bush’ that I mention above. They help, but it still is not very easy to dis-entangle the three modules from each other.
Then, only at one of the very last stages, I realized that I may want to change the batteries of the Mindstorms brick. Duh. That was just after I had completely bolted it into the design. Fortunately, it wasn’t too complicated to undo that without too much loss of strength of the centre module. Still, you’ll be busy to get to the bottom of the brick: it takes about 10 minutes to get the Mindstorms brick out, and a bit more to put everything back in place.
Concluding
It was an incredibly interesting experience and I learned a lot, not just about the cool bricks that have been added to the Technic library during my dark years. One of the most difficult parts was when to declare it finished. It’s not just that improvements are needed, like the ones listed above. I also have a few wishes for more functionality: a camera on top of the turret and a cargo bay for more instruments or other payload, remote control via the wireless network, and a GPS sensor for better navigation. But then again, during the work I got some more ideas for totally new MOCs …
Earlier designs and part-designs
