

MOC manual service. Get a step-by-step manual of your MOC.
Click here to learn more.
1 Recap
You can skip this if you have read the previous posts.
Mid May, I started making an alternative build ( alt build ) for the VTOL Heavy cargo spaceship LT81 ( in this post, I refer to it as the original set ), and I decided to explain how I think making an alt build starts. It maybe helpful for those who do not know how to start, and it helps me reflecting on how I work and hopefully improve, perhaps with your comments.
The posts are structured in chapters and sections in such a way that you can easily follow the steps and the thinking even if you are not interested in Technic or spaceships. The spaceship is just the example. You can read all about that in these five posts:
- Introduction to three steps
- Sketching a first design
- Running into a snag with an essential feature
- Pivoting
- Moving on after pivoting
At the end of the fifth post, I concluded, that ‘yes’, my idea will most probably fly.
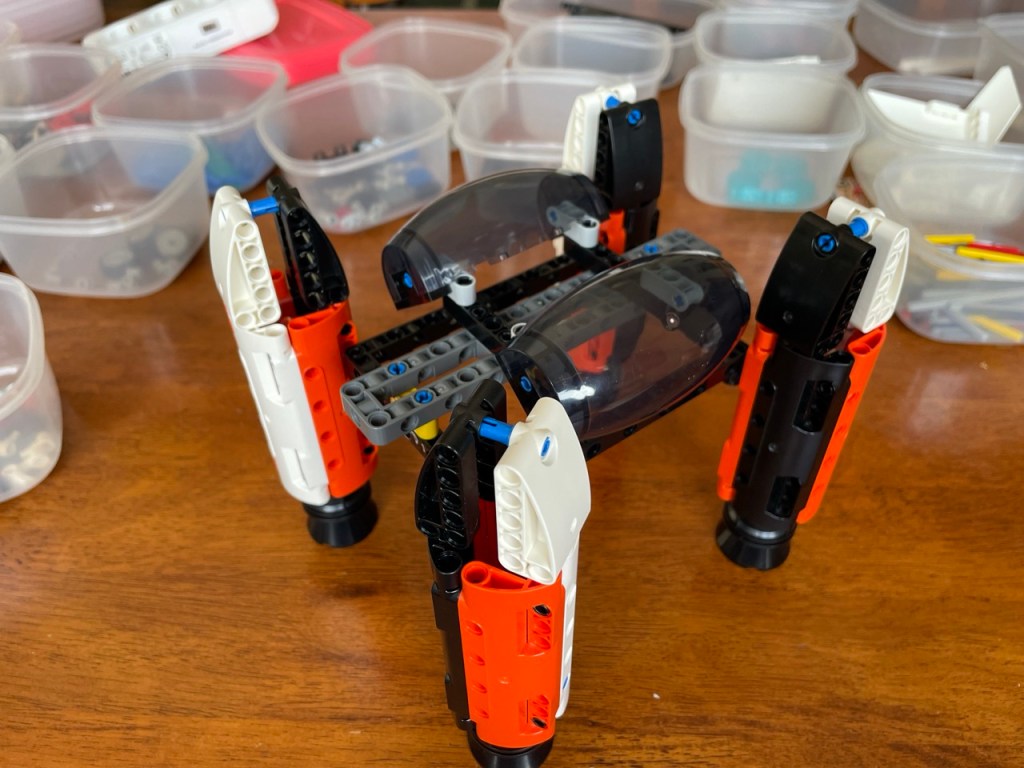
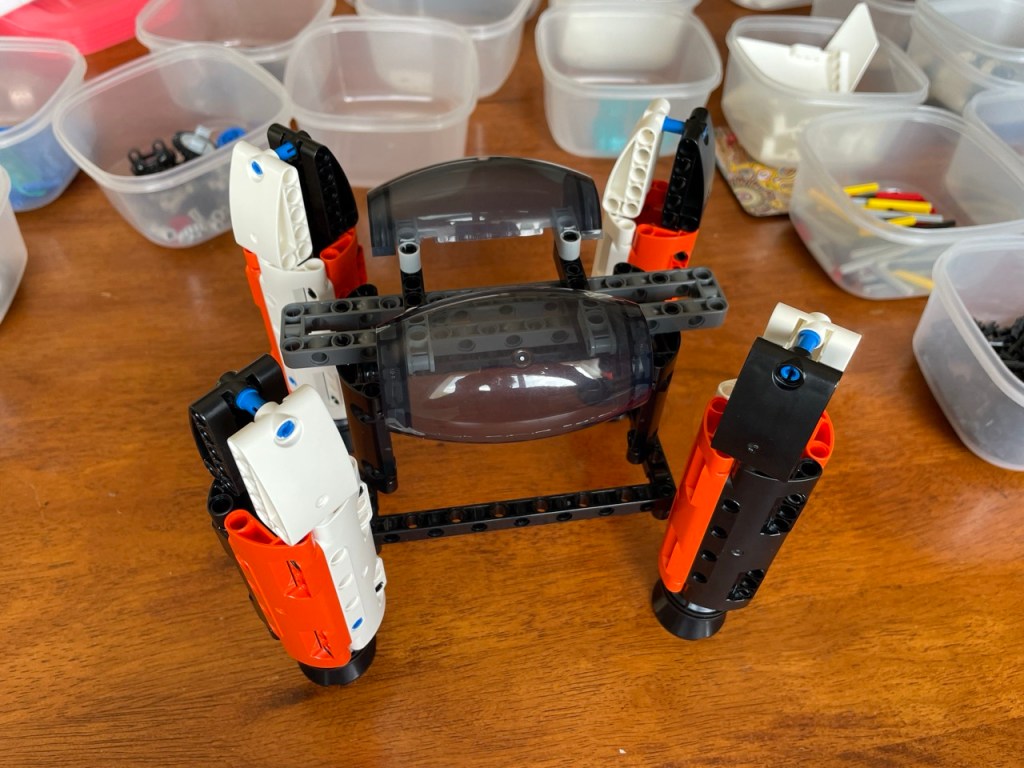
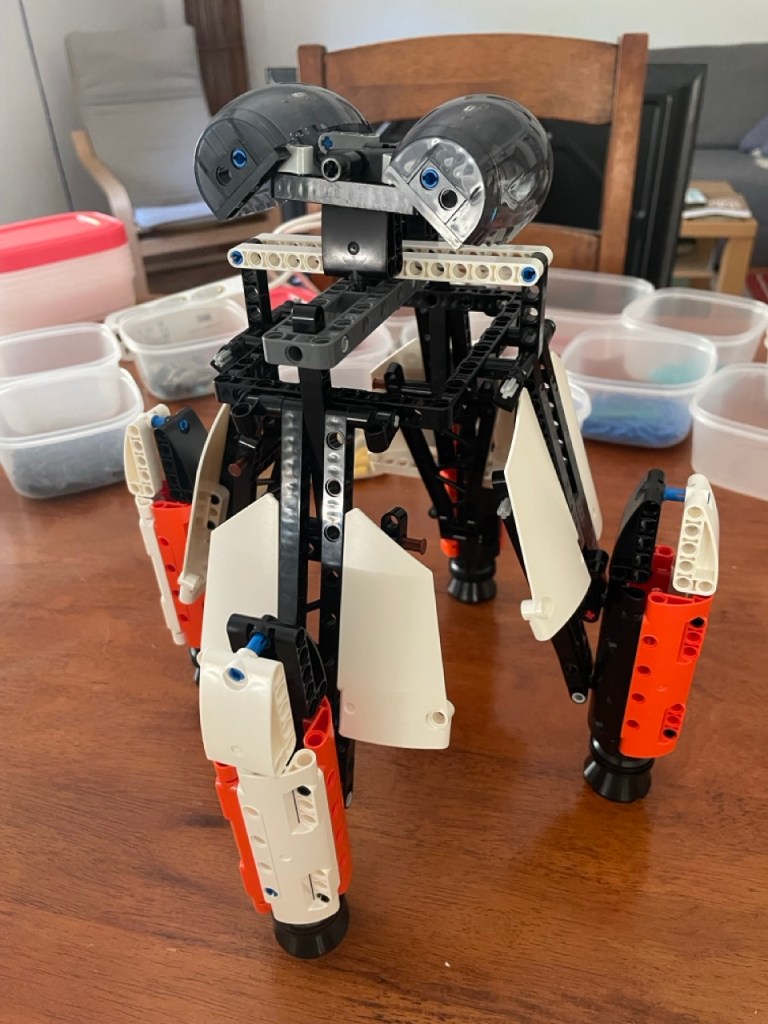
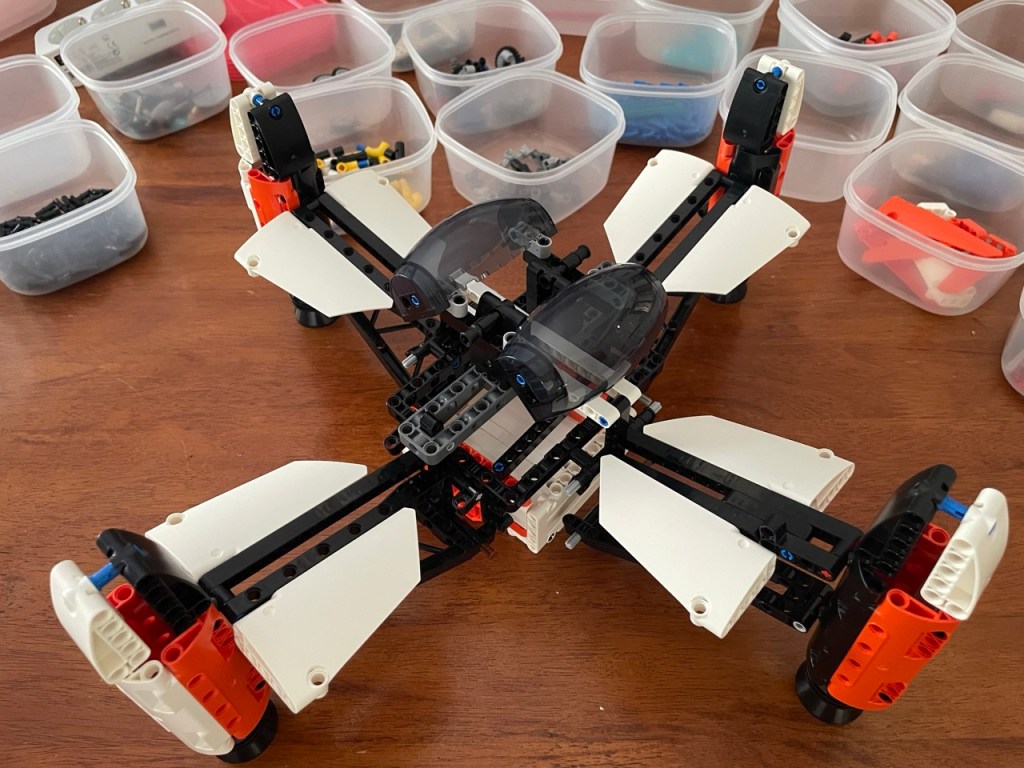
Below you see the various overall sketch versions. To get to version 3, I had to do some rethinking of what I wanted to build, which essential features is has, and how the spaceship should be operating. I realized that one really needs flexibility in thinking.
All images in this post can be clicked for a full screen version
After this rethinking, the idea for the spaceship is that 1) it has a more symmetrical and realistic design compared to the original set. Initially, I was toying around with both a three and four engine version, but I traveled down the four engine path. 2) Instead of hanging the cargo under the ship, it should be held inside the ship during flight. 3) The ship should have some folding mechanism for landing and takeoff, i.e. the engines have to move away from and back to the ship’s hull as illustrated in v3.
So, I finished the blog series of how to get started on an alternate build. Since there was quite some interest among Rebrickable and Reddit users, and because the writing keeps helping me improving my skills, I am continuing the series with some more insights and reflections on how I design MOCs and alternate builds.
2 About this post

This is part 3 in the series. Part 1 is here, and part 2 here. At the end of that post, the spaceship looked like the image to the right.
The current post continues with more design insights.
As before, I aim to write in general about the design of an alternate build and use the spaceship as an example. If you are only interested in the design insights, then know that the following chapters have two sections. The chapter title announces the design insight, the A section tells about the development of the spaceship, and the B sections ( aptly called ‘MOC design’ ) provide the insights. Here is a clickable table of contents.
- 1 Recap
- 2 About this post
- 3 The endless search for bricks in the MOC
- 4 Design by fly by
- 5 Tacit knowledge
- 6 Just going for it and solving problems along the way?
- 7 It is okay if it does not work out at the first attempt, and the rule of three
- 8 Version 6
3 The endless search for bricks in the MOC
3A Bricks needed
Version 5 as shown above, but also its predecessors are less sturdy than I wanted them to be. The whole ‘box’ can be squeezed sideways somewhat into a parallelogram. It needs L-shaped bars to prevent that. Unfortunately, the only suitable ones ( 5×3 L-shaped ) in the original set are already used in the arms of the engine pods. As it happens, there are alternatives for their use in that location, which are the 8 thin 3 x 3 L-shaped bars. To replace the 5×3 with the 3 x3 required taking most of the model apart.
Later on, I also ran short of the blue half axle half pins. So, where I could I started replacing the ones I had used with the red 2 L axles. This was less work for the ones on the outside of the model, but obviously more at the inside. The latter, I obviously only replaced while I was doing an overhaul. Or rather, I wanted to do that.
Lastly, I also started running out of 4×2 L-shaped bars. Replacing those is less easy but I found a way to replace 4 out of 8 that were in use in the engine pods. The original model has many of my favorite pins-with-pinhole ( in black, white and grey ) which I could use for the replacement. See the pictures below.

I took the opportunity to also change the color scheme. One can also notice that the location of the connectors moved up one pin hole. This was needed for the addition of the cargo grabbing mechanism. More about these changes below.
Probably because I use two pins-with-pin-hole for each 4×2 L-shaped bar and because four more pins with pin holes were used to position the jet exhaust at the bottom of the engine pod, I later ran out of pins-with-pin-hole, and I had to re-design the engine pods again.
3B MOC design
The further an alternate build ( or a MOC with a limited supply of bricks ) progresses, the more often, the bricks one needs for the next new feature or improvement will not be available because they are already in use.
Fortunately, in many cases, those bricks in use can be replaced by other bricks that have not yet been used. This is because, normally, one would choose the bricks that most easily produce the desired shape or effect. Fortunately, one of the beautiful things about brick systems is of course that the same result can be achieved in different ways.
However, this is where one enters the vicious spiral of alternative solutions, and one replacement can lead to another shortage later on. The further a model develops, the more features are implemented and add-ons are added, the fewer options for replacement remain.
One may actually have to do an entire overhaul to make dearly needed bricks available.
Worse, at some point, no option for replacement remains without loosing features or structural integrity. One may have to make difficult choices. This simply is how it is with a limited supply of bricks. But no worries: in the end result it will not be visible that it is not entirely what you wanted.
4 Design by fly by
4A A folding tip for the ship
On day, I happened to pass by the table where I was build the spaceship. I had not worked on it for days, or maybe even weeks, and I was brushing my teeth or something. Then my eye fell on the curved brick, just lying there.

I started wondering what I could do with them, and I got this idea while playing around with it and a few other bricks. One thing lead to the next and I ended up making a fold-able tip for the ship


I was particularly happy with the final design in which one can lift one of the four curved bricks and all the others will move along at the same time. It would be even better if I could connect it to the folding of the engine pod arms, but I did not get that to work.
4B MOC design
Design by fly by is one of my favorites. Basically, it is a matter of leaving your design be in a place where you regularly can have a look at it while you are going through your daily non-brick moves and business. More often than not, nothing happens. But you just may get a brilliant or otherwise good idea for a new feature, an improvement, a replacement, or even an idea for a whole new MOC.
I believe that the psychology behind it is that by regularly looking at your work in progress, you stimulate your unconscious brain to work on your MOC while you are doing something else. Whether it really works like this or not, for me it works, and I enjoy those moments tremendously.
Sometimes, I just make a mental or real note of my new idea. Sometimes, I immediately sit down and get to work on it.
One consequence of letting your MOC ‘stew’ in your mind is that you can not actually work on it during the stewing.
When progress on a MOC is slow, it may be time to let it stew in your unconscious brain. It means that you won’t be working on it for a while. To keep busy with building and designing, your can work on multiple projects at the same time. This does require resources, such as table space and plenty of bricks to work with. Family members may or may not be bothered by this. A separate work room would be great for this, but has the downside that you do not regularly pass by while doing other things, as you would when using, say, the kitchen or living room table.
5 Tacit knowledge
5A A hooking mechanism for the cargo container I
An important thing left on the to-do list for this spaceship was some mechanism to hook the cargo container inside the cargo bay, so that the ship can actually lift it. The redesign of the engine pods ( see chapter 3 ) also involved a change in the color scheme. This made white panels available, which in turn meant that I could use the base shape of the original set’s cargo container.
So far, I had not given a lot of thought to this mechanism, except that it would be located somewhere in the walls of the cargo bay. After all, the cargo bay is where the cargo goes. Duh. Also, I had been careful not to put anything else in that wall if I could avoid it. What I also somehow knew is that it should be possible to make such a mechanism with the gears and other moving elements that were still left over. It was not much, but it should be enough.
I had not made the hooking mechanism an essential feature because, it did not seem important at the time that I was defining those. Anything would do, I thought. But now that the time had arrived to build it, I did want it to be as fancy as possible. With a neat lever to operate it. Because it was not an essential feature, I also did not deliberately think through if the original set would have sufficient bricks for it. Still, I just knew. And I was right.
5B MOC design
Wikipedia describes tacit knowledge as “knowledge that is difficult to extract or articulate”. This in opposition to formalized, codified or explicit knowledge. One downside of it is that by definition it is difficult to explain to others. Intuition, wisdom and motor skill are forms of tacit knowledge. As with many crafts, brick builders and designers also gain tacit knowledge. At some point one just knows that something can be made, or not, with an available set of bricks; knows how to go about fixing a problem or building a shape; knows which colors fit nicely together, and so on.
At the start of this series, I wrote about guesstimating if certain essential features or an entire MOC can be made or not with a limited set of bricks. The more tacit knowledge a designer has, the easier they can simply ‘see’ this.
6 Just going for it and solving problems along the way?
6A A hooking mechanism for the cargo container II
Below are some photos of the end result and a video showing how it works. It boils down to it that a lever turns two sets of small bars from a vertical to a horizontal position. They are connected through gears, axles and universal joins.


The mechanism itself is rather straightforward, but integrating it into the spaceship’s walls was a hassle and required removing and reinstalling all four engine pod arms.

When the mechanism was implemented and then tested, it appeared that the container could move around a bit which meant that it could block some of the gears or slide off the hooks. So, I had to add bumpers and guides ( the white 2×3 curved L bars, visible in one of the photos above ) to prevent it from moving. Since these had to go to difficult to reach places, I had to again take three engine pod arms away, one by one, remove parts of the hooking mechanism, add the bumpers and then put it all back together again.
Then I realized that I could and should add some more reinforcement to the walls, which again lead to mayor surgery.
Hold on, there is a pattern emerging here.
6B MOC design
My overall design approach so far has been to:
- Take a rough idea
- Define essential features
- Make a sketch
- Build the features one by one
- Attach them to the sketch
- Solve problems when they occur
Throughout the time, de sketch became less of a sketch and more and more the final version under construction. One may have noticed that I dropped the word ‘sketch’ as the prefix of the version number.
This step by step approach has worked so far, but as the previous section illustrates, one may run into the limitation that the MOC becomes more and more complex, and thus increasingly difficult to change. Especially if the change is relatively deep within the MOC.
For much bigger models, a different approach might be better. I have some thoughts on this, but those would explode in a whole series of posts. Maybe, I will write them down some time in the future. And maybe not.
7 It is okay if it does not work out at the first attempt, and the rule of three
7A The ugly handle
As I mentioned in my previous post, I am not very happy with the handle to hold the spaceship that I felt necessary to introduce. It really comes in handy when holding and playing with it, but it sure is an ugly add-on. So, I tried to make it less of an add on. My tried and tested approach is to simply make it look like a feature that was supposed to be there as part of the spaceship anyway. Since the ship is somewhat symmetrical with a square box in the middle and an engine pod arm on each side, the handle would at least need a counter part on the opposite side. That one could then be decorated with spaceship elements, like radar dishes, antennas, and maybe even a cockpit.
So I built the other arm … and then decided it simply looked horrible. So much so that it was beyond improving through decoration. See for yourself.

To me, it looks horrible because it big and clunky. Moreover, it takes the fire out of the engine pod arm underneath it, especially when it is folded down. Also, in ‘real’ the arm would create a lot of drag when the ship is flying through an atmosphere, whereas the idea of the folding arms is that they create the drag only when needed.
Maybe the handle should be at the top, with a lever that can be squeezed down with an entire hand?
7B MOC design
Perhaps I have mentioned it before, but it is worth making a separate chapter for this point. MOCs, and definitely great MOCs, do not come together in just one attempt. Things need to be tried out and re-designed for the MOC to improve. You may get disappointed if your great idea does not pan out and then you may get demotivated to go on. That is okay too. You tried and you learned something along the way.
But your reward will be much bigger if you step over the disappointment and go for your next best idea. It is probably still a good idea, and perhaps, after a while it turns out to be an excellent way to move on. You likely even forget the first great idea that did not work out.
In my experience, on average, it takes about three attempts before the result is good enough or great. Sometimes two and sometimes more than three, but not very often just one. This rule of three applies to the overall MOC, but also to its sub-models and parts. Which means, it is difficult to do a version count, and including all changes would lead to quite a high number of versions.
Having said that, I hereby declare version 6.
8 Version 6
Before taking the pictures, I added the tip from the design-by-fly-by chapter, quickly attached the cockpits and tried to give the square box some more shape with panels. I am not happy with those panels, but they at least give an idea of where the design is heading.


Frank van der Most, 11 August 2026
NAIP ( No AI involved production )

