MOC manual service. Get a step-by-step manual of your MOC.
Click here to learn more.
1 Recap
You can skip this if you have read the previous posts.
Two days ago, I started making an alternative build ( alt build ) for the VTOL Heavy cargo spaceship LT81 ( in this post, I refer to it as the original set ), and I decided to explain how I think making an alt build starts. It maybe helpful for those who do not know how to start, and it helps me reflecting on how I work and hopefully improve, perhaps with your comments. You can follow the steps and the thinking even if you are not interested in Technic or spaceships. That is just the example.
The take away from the first post is that you need to compare your idea(s) for an alt build with the limited supply of bricks that are available in the set that you are making the alt build from. This may be a simple job, but for bigger or more complex MOCs it may not be so. You may even have to build essential features of your idea in order to find out.
For my idea for a cargo spaceship, I indeed should first work on an essential feature. However the next day, I got quickly sidetracked. I started making a sketch model of the entire ship, and I got a cool idea for a new feature.
After that, I actually started making the essential feature, a folding mechanism, so that the ship can land, lower itself over the cargo so that the cargo gets stored inside the spaceship, and then lift off. Inspired by the folding mechanism for the landing gear of the original set, I also wanted to use a folding mechanism for the lowering over the cargo. The thing is that I am not sure the set contains the right bricks and enough of them to make such a folding mechanism for four or three engine pods.
2 Developing a folding mechanism
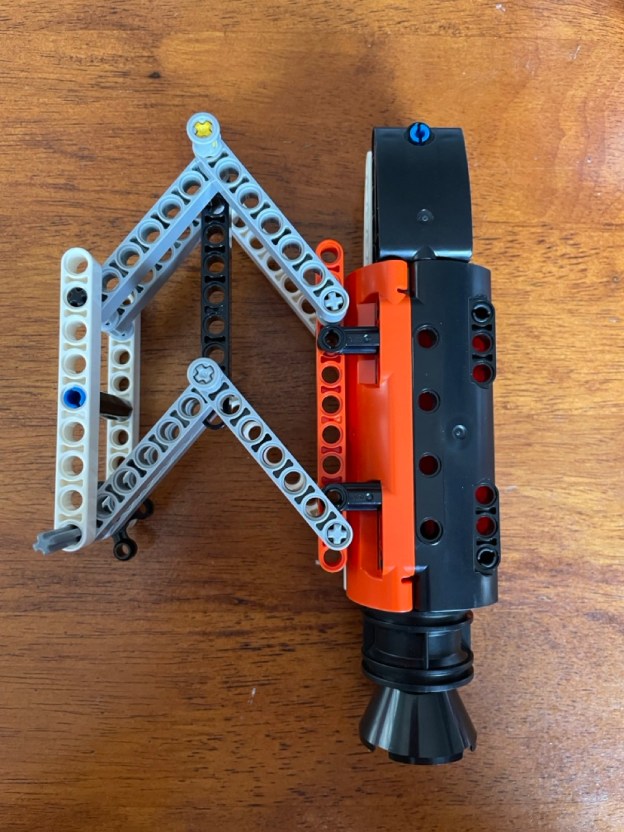
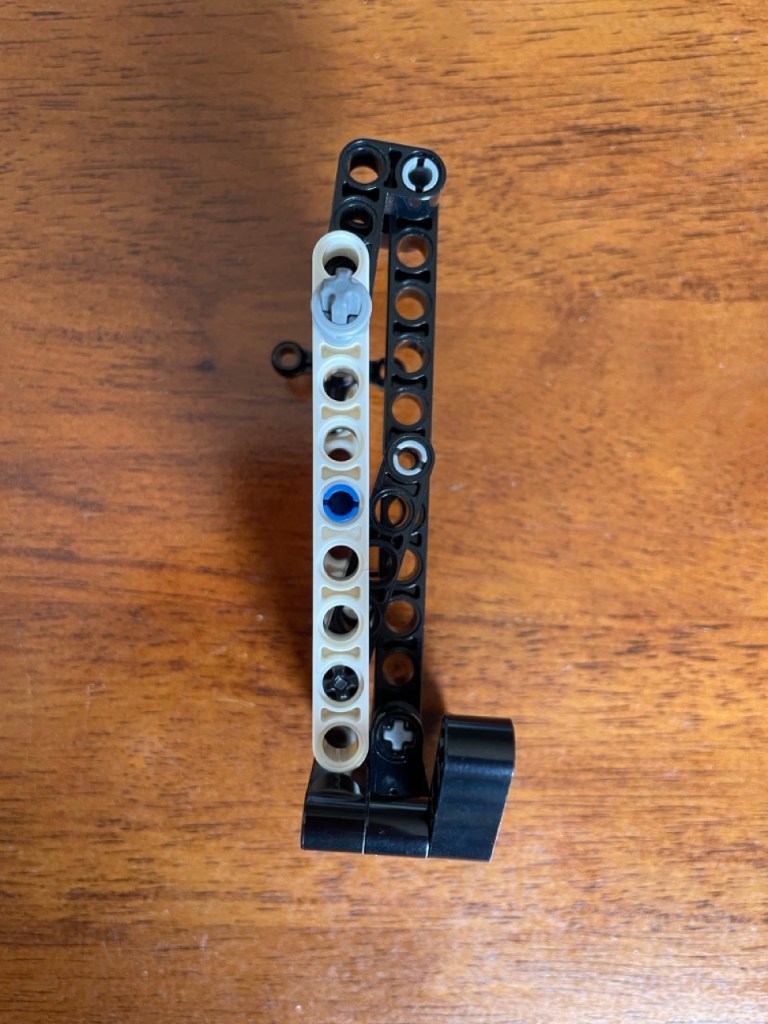
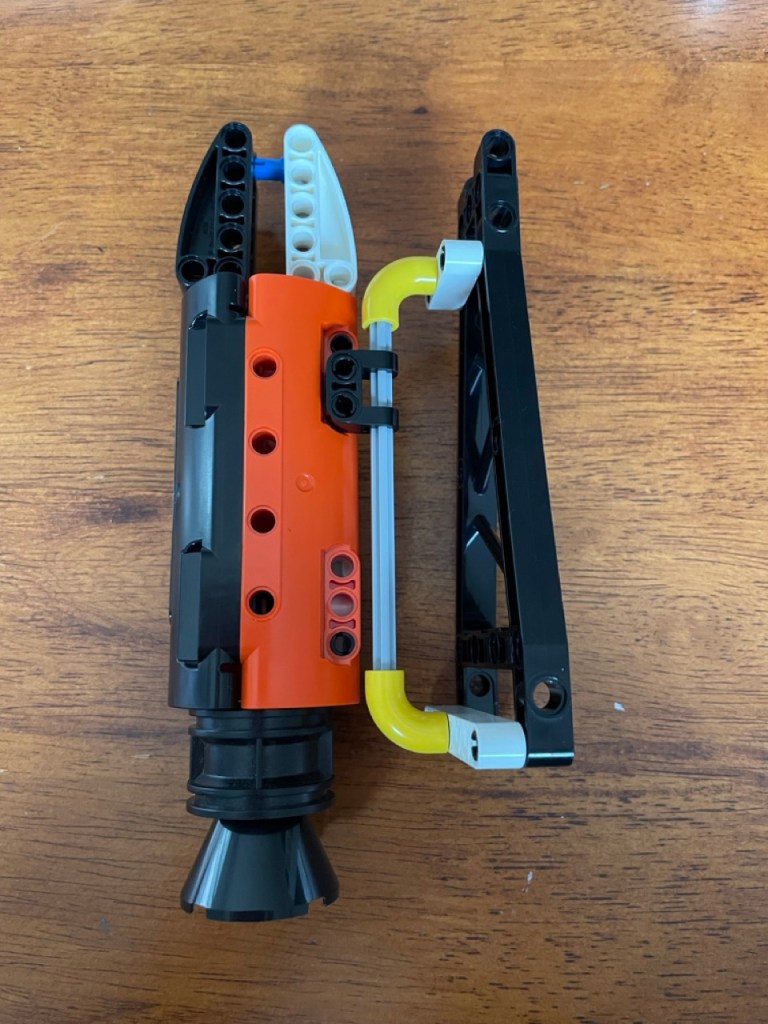
Since the folding mechanism of the original set inspired me, I started with building it from the manual. Fortunately, it is designed as a separate module, which made it easy to leave out the rest of the spaceship. This is what the left landing gear module looks like.
I stripped some parts so that mostly the bare mechanism remains.
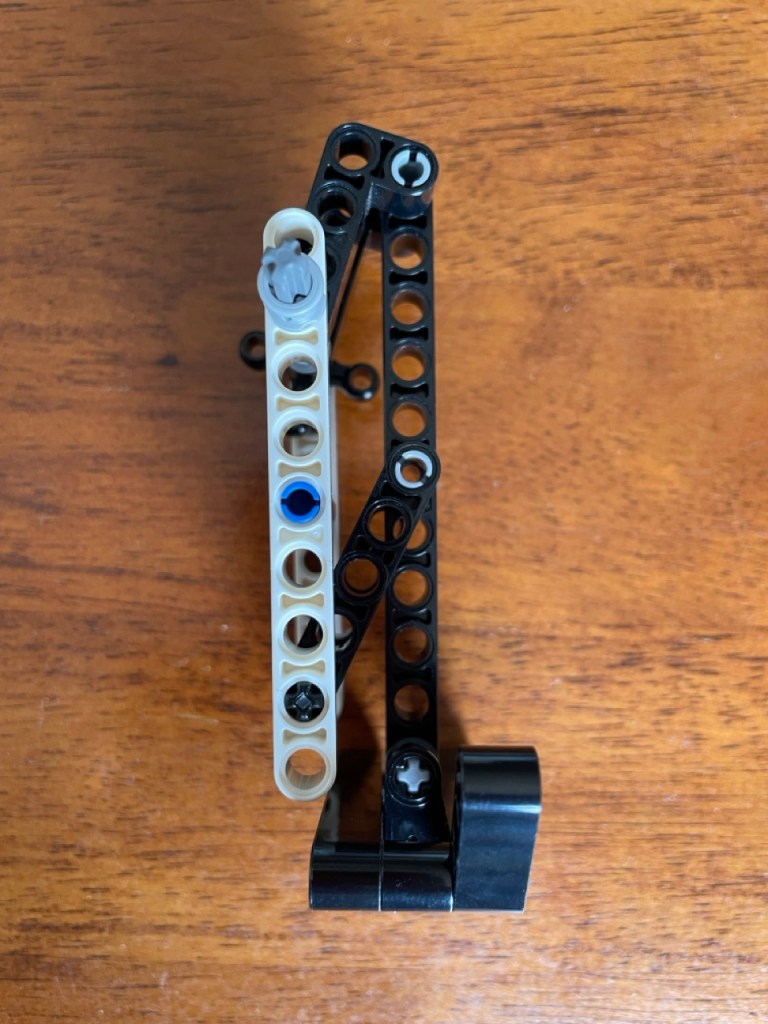
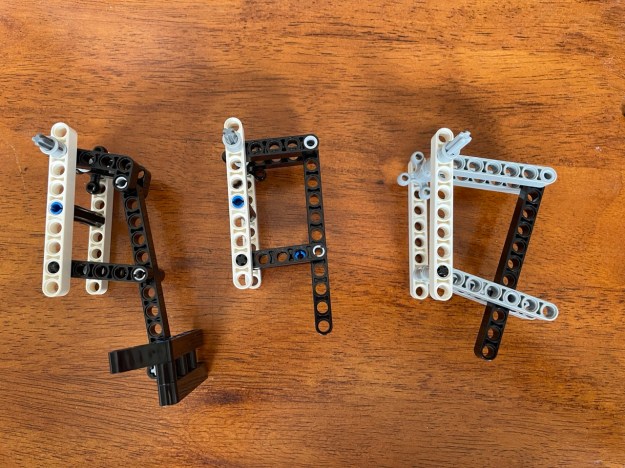
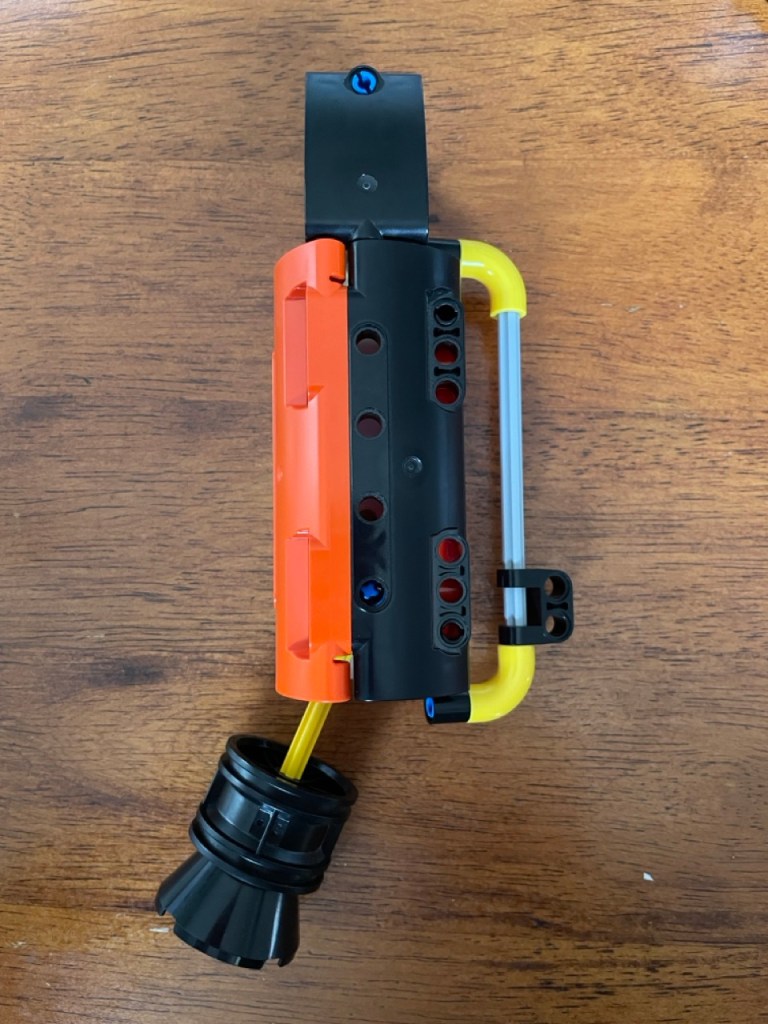
The following pictures show how it works, and how it locks itself in place when the landing gear is extended and the spaceship’s weight rests on it. The white bar is the one that connects the assembly to the spaceship. The locking in place is caused by the 4×2 bar at the top. If it would have been a straight 5 stud bar as the mechanism has below, it would not overstretch and not lock in place. Also, the leg would not stretch out diagonally to the right ( in the pictures ) but go down vertically in parallel to the white bar.
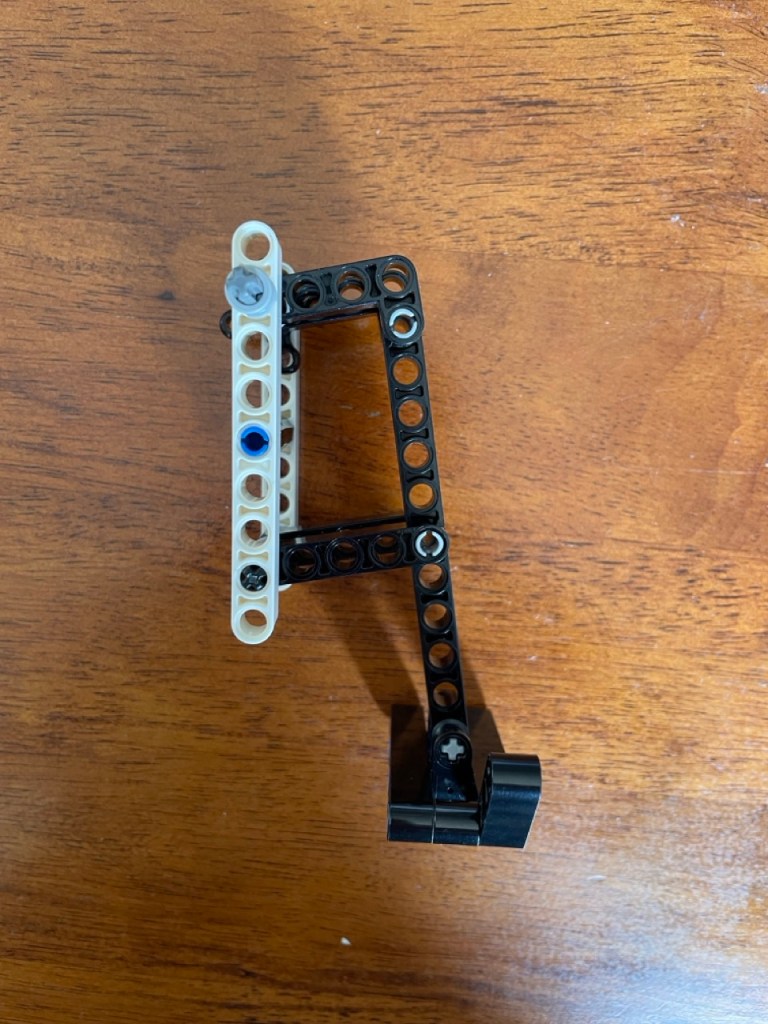
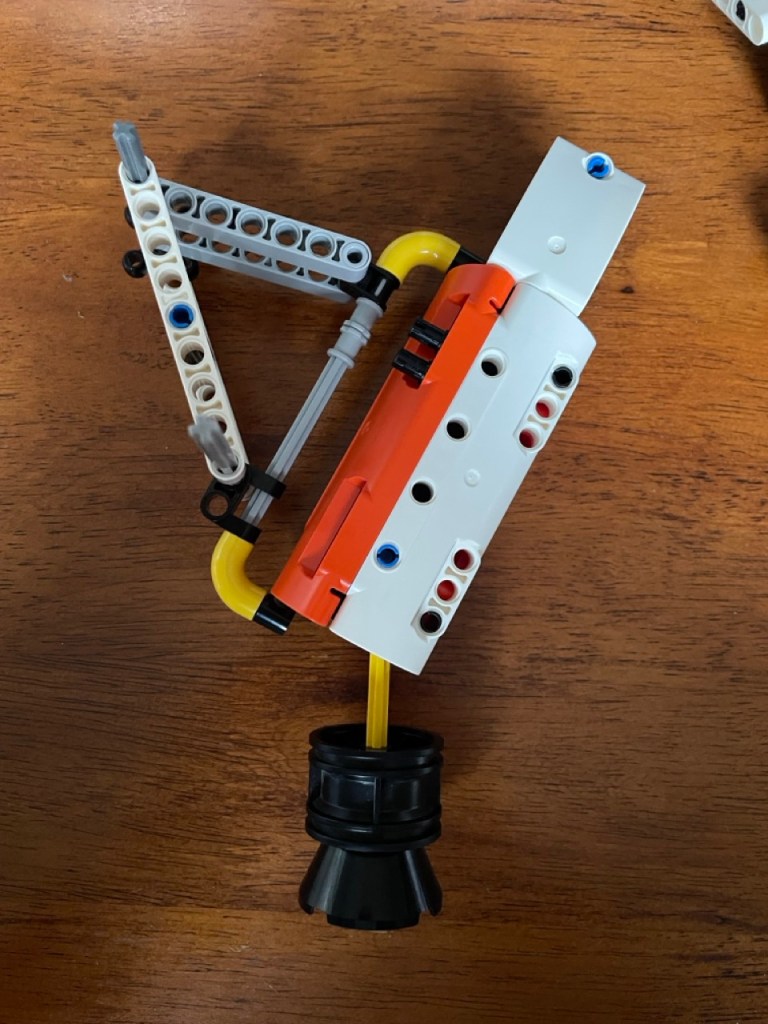
Once I knew how it worked, I tried alternative versions because I do want the leg to go up and down vertically, otherwise the engine pods would get weird angles. Also, the engine pods need two attachment points, not one like the ‘ski’ of the landing gear. I made a simple adjustment, like the one you see in the middle. The engine pod would be attached to the vertical black bar.
Simple is good when it comes to mechanisms, so it looked promising. The downside was that it had no locking mechanism anymore. I started thinking about this problem when I realized that I had overlooked a mayor ‘feature’ of the mechanism that would stop me in my tracks.
3 Snag
The snag was that the mechanism not only moves a bar up and down, but also from left to right in the pictures. As I imagined the spaceship, it would first land and then lower itself while standing on its engine pods. With this mechanism, the engines would be pushed outward, away from the hull of the spaceship. That is of course not very elegant nor realistic. If the engines would not move outward, the ship can not lower itself, which is of course not acceptable either.
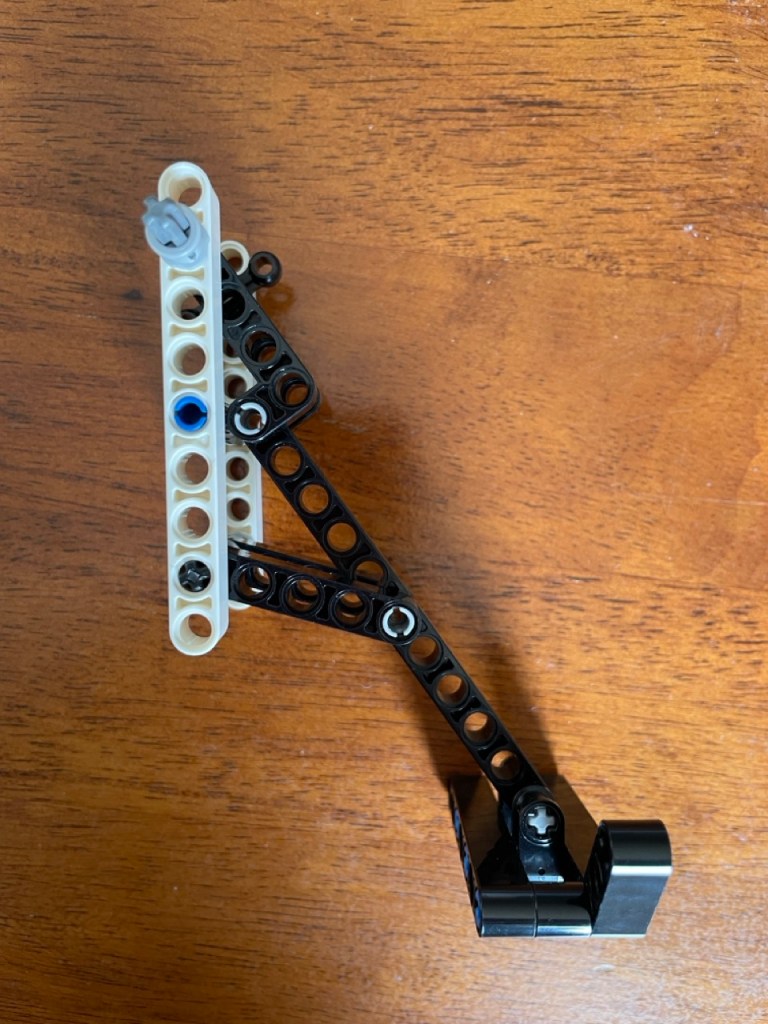
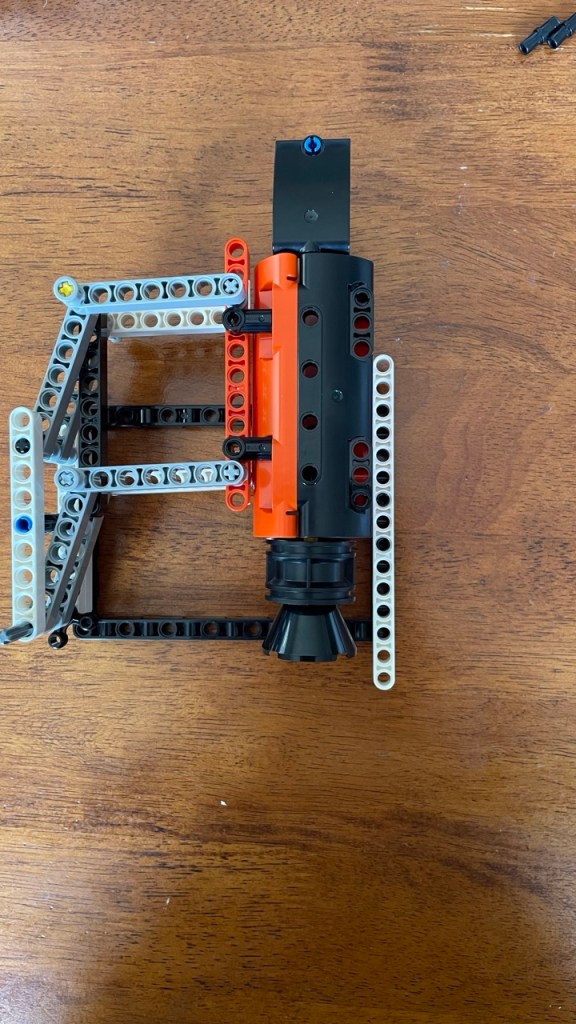
I had to look for alternative folding mechanisms. The mechanism on the right in the photo above was the next attempt, i.e. version 2. It was not acceptable because, the outward movement remains, even though it is a bit smaller. Also, the tops of the engine pods would tilt outward, which could work.
I needed other ideas.
4 Folding mechanism version 3
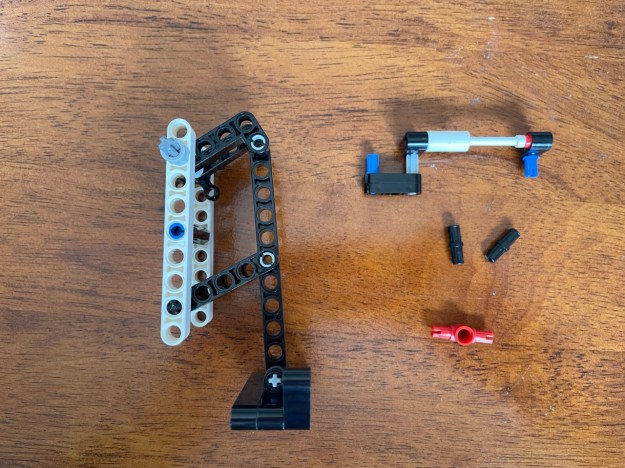
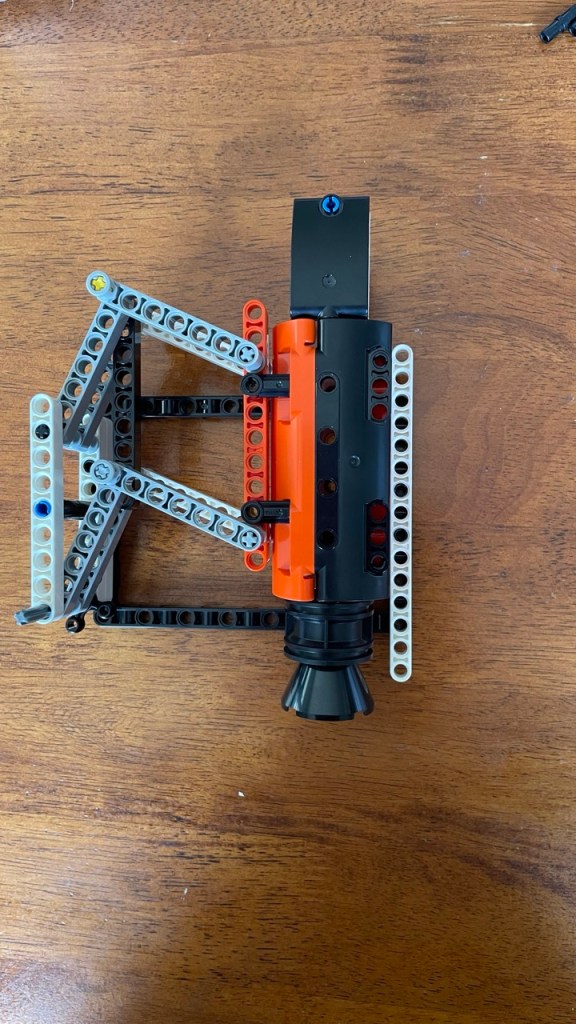
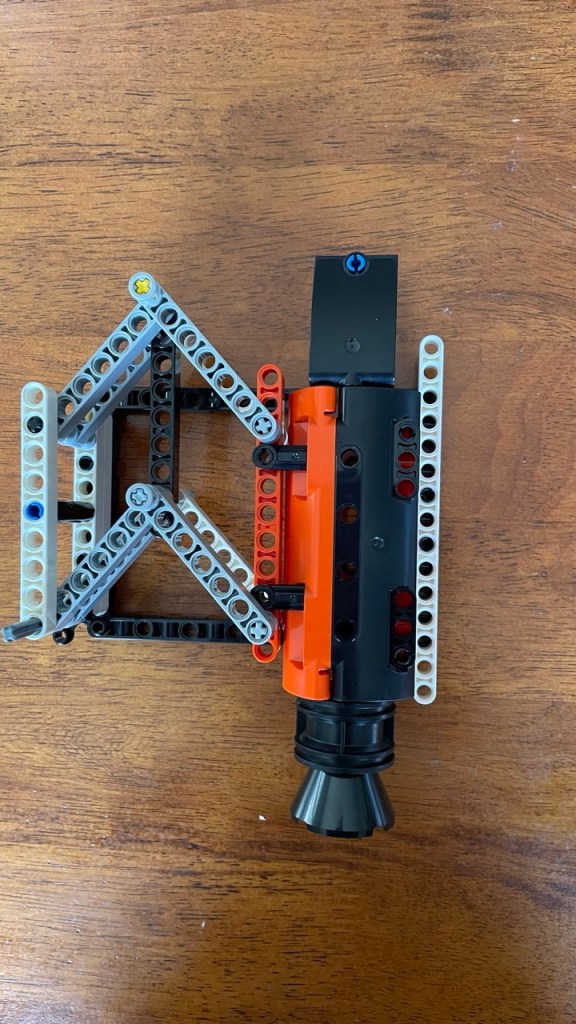
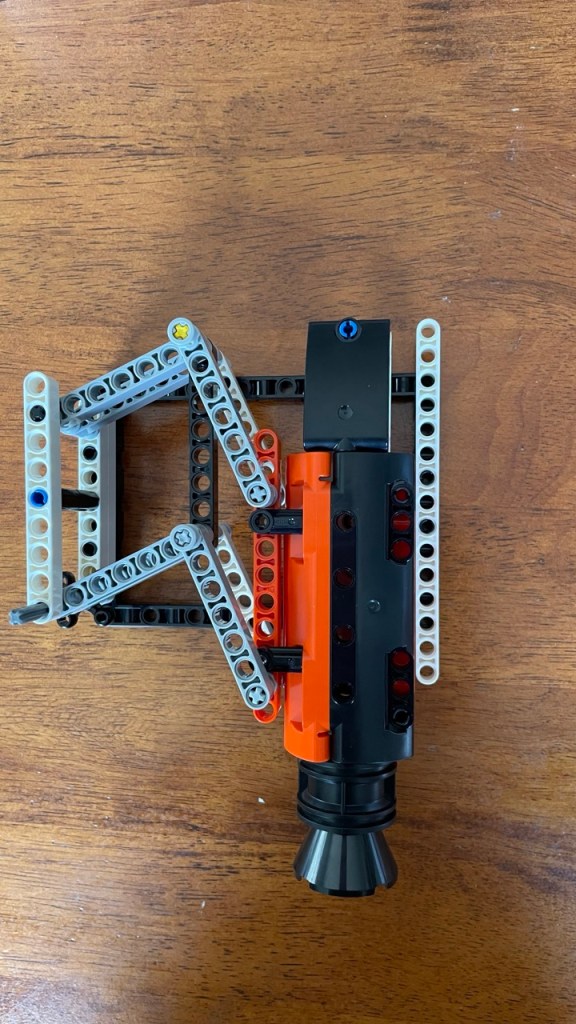
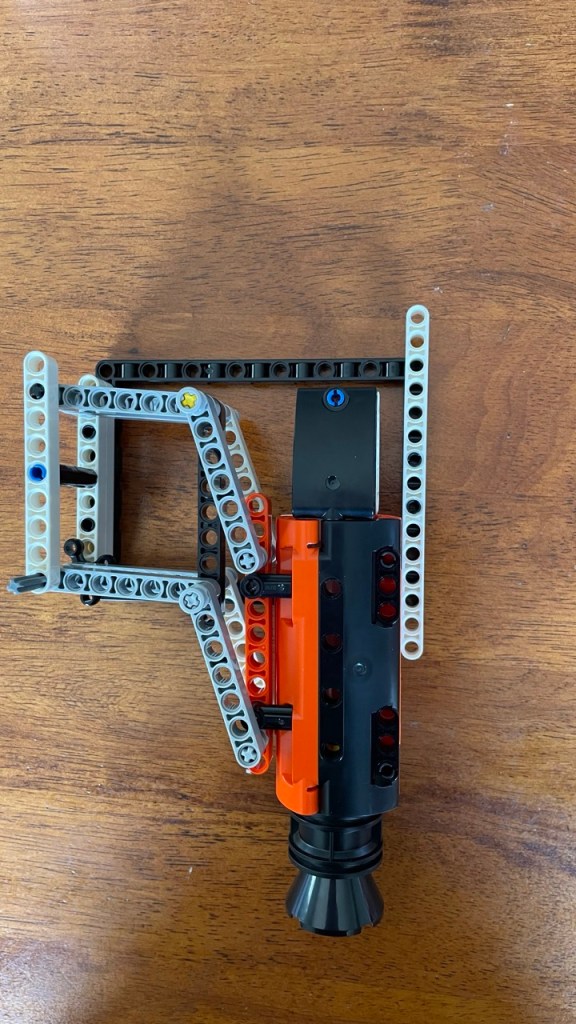
My next idea was to improve version two, so that the bottom of the black bar would not be pushed outward at all. I hoped to get that effect by making the bottom grey bar fold-able, such as in the following pictures.
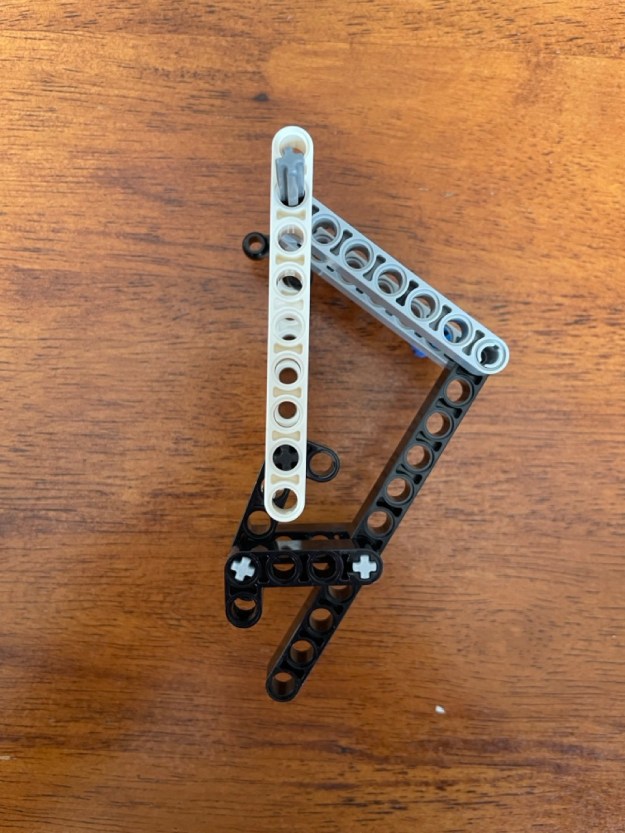
The bottom tip of the 11 stud black bar remains ( more or less ) directly under the white bar, which is what I wanted. However, the extension was not big enough, and when I tried moving the black bar further upwards than in the left picture, the bottom tip did not stay in place. Another problem to solve is that in the right picture, the black bar is not locked in place. Even if the angle between the white bar and the grey bar is fixed, the black one can still rotate. I abandoned the idea. Time to move on to something different.
PS Now that I am writing this, I think I should give it another go. It might have been an issue of further trial and error with different varieties.
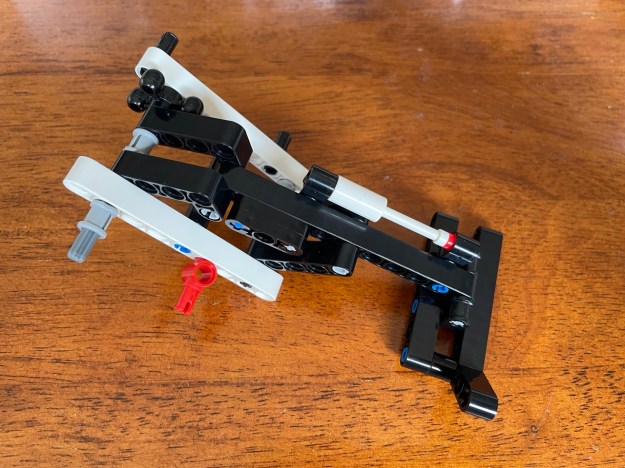
5 Version 4. Not folding but sliding
My rule of three versions kicks in. After three failed attempts of solving a problem in a certain direction, it is time to think of something completely different. I started thinking of sliding rather than folding.
This would definitely work. I saw two downsides though. One is that it would be difficult to make all four or three engine pods slide up or down at the same time because the friction is quite big. Secondly, I would have to kill my baby. I did not want to abandon the idea of using folding mechanism. At least not yet.
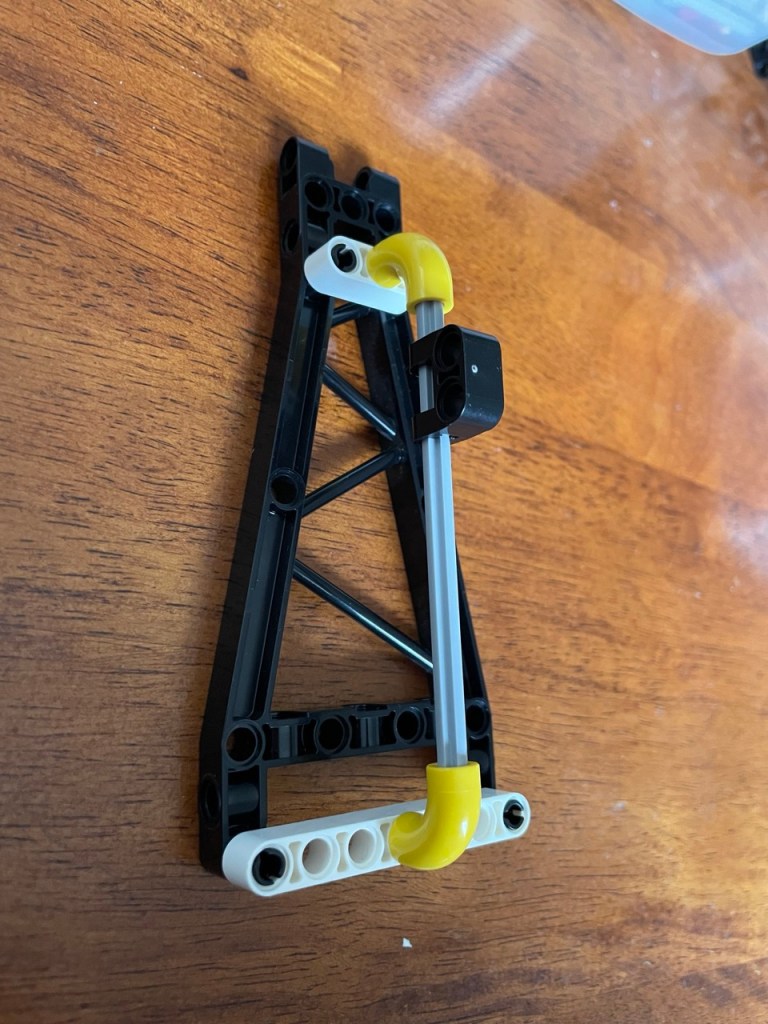
What if the slider could counter the outward movement that occurs with version 1 and 2 of the folding mechanisms? I came up with this.
It clearly is a desperate attempt. It simply did not work. Even with a lot of tinkering I did not see how it could even work, and the jet exhaust on a stick just looks ridiculous.
I gave it a rest for the rest of the day. Often it works to just stop and do something else for a day/week/month and let your subconscious brain work on the problem.
6 Version 5. Back to folding
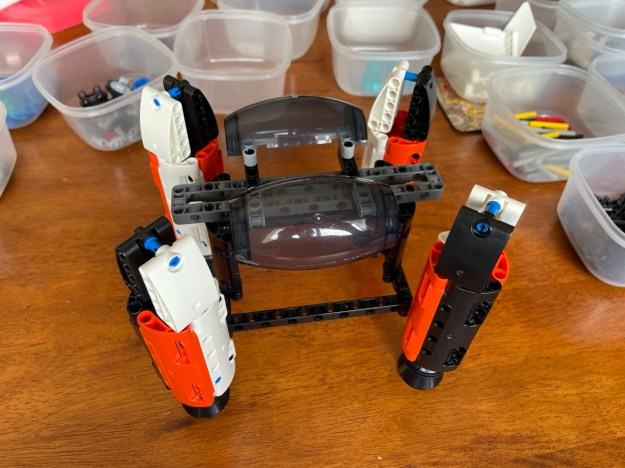
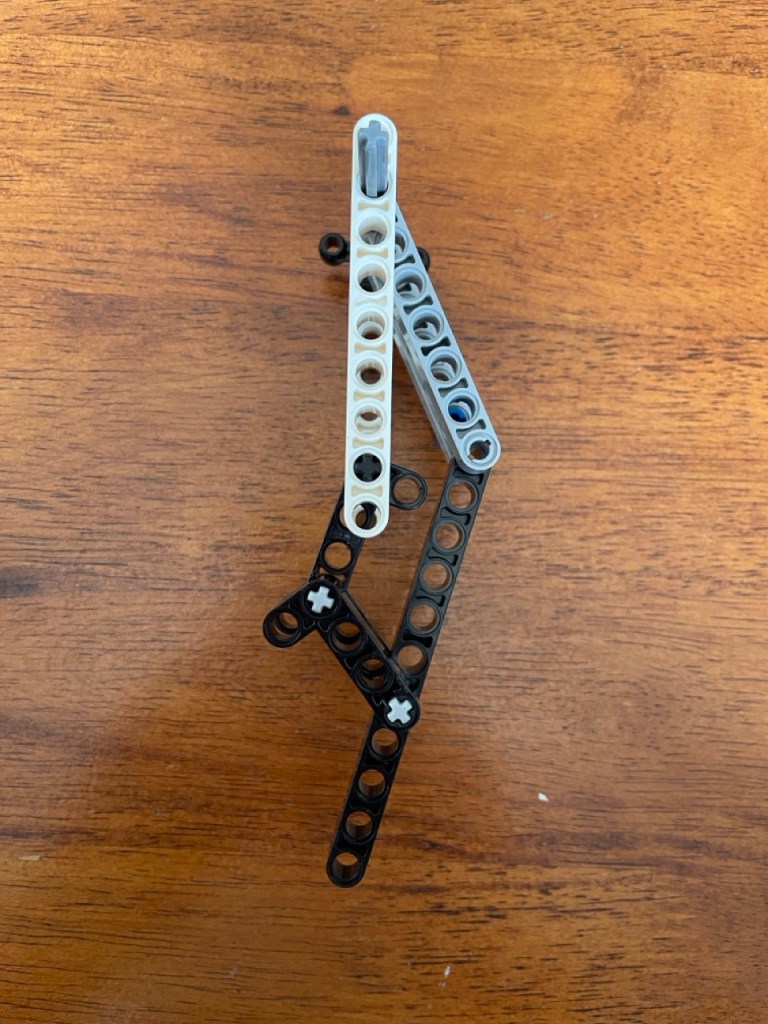
And indeed, the next morning, I had the solution. At least in theory. It looks like this:

The sequence below shows that it works.
It is great that the folding works as I wanted. Unfortunately, it has two deal-breaking downsides. Firstly, the original set does not contain enough bars to make three or four copies of this. Secondly, I would not immediately know how to power a movement like this and how to lock it in place in its top and bottom positions. Moreover, even if I could come up with solutions, the original set would not have the required bricks. In short, the solution is too complicated.
7 Now what? What would you do?
For the time being, I see four options.
- Continue tinkering with version 3.
- Abandon the essential feature.
By my own method, that would be fine.
.
Also, if you think about it, it is a weird feature. A spaceship that first lands and then folds itself around it’s cargo?? Why would it not immediately land on top of the cargo? Well, nerdily speaking, maybe it can not position itself precisely enough to do so? Really? Space X can already land a rocket on a platform or snatch it from the sky with a hook. Would a future spaceship not be able to maneuver far more precisely? Precisely! End of nerd talk.
.
It may be a weird feature, but in spite of my own advice, I have grown attached to it already. I mean, it has been in my head since I got the set last year April. I really want it to have a cool folding mechanism. … Wait … option 3
- Pivot to a different feature to apply a folding mechanism
That sounds like a neat way out, but I have no idea yet.
- Abandon the project
Yeah, no! Then I would at least want to make a static version. It’s a bit of a let down for a Technic project, but so be it.
What would you do? All help and advice welcome.
Frank van der Most, 18 May 2026
