MOC manual service. Get a step-by-step manual of your MOC.
Click here to learn more.
1 Recap
You can skip this if you have read the previous posts.
Three weeks ago, I started making an alternative build ( alt build ) for the VTOL Heavy cargo spaceship LT81 ( in this post, I refer to it as the original set ), and I decided to explain how I think making an alt build starts. It maybe helpful for those who do not know how to start, and it helps me reflecting on how I work and hopefully improve, perhaps with your comments. You can follow the steps and the thinking even if you are not interested in Technic or spaceships. That is just the example.
The take away from the first post is that you need to compare your idea(s) for an alt build with the limited supply of bricks that are available in the set that you are making the alt build from. This may be a simple job, but for bigger or more complex MOCs it may not be so. You may even have to build essential features of your idea in order to find out.
For my idea for a cargo spaceship, I indeed should first work on an essential feature. However the next day, I got quickly sidetracked. I started making a sketch model of the entire ship, and I got a cool idea for a new feature.
All images in this post can be clicked for a full screen version
On the third day, I actually started making the essential feature. That feature is a folding mechanism, so that the ship can land, lower itself over the cargo so that the cargo gets stored inside the spaceship, and then lift off. Inspired by the folding mechanism for the landing gear of the original set, I also wanted to use a folding mechanism for the lowering over the cargo. I discovered a mayor snag with this feature. I tried out different designs for it, and asked you, my dear reader, for your solutions.
On the fourth building day, I continued my efforts, but could not get the essential feature working. Not even with the ideas that you came up with. I realized that what I really wanted to keep was the folding mechanism. What I could let go and rethink, was how it plays a role in the functioning of the spaceship. Instead of folding over the cargo after it landed, it could also fold out before it landed, which in the end also made more common sense. To get to this realization, I had to zoom out from the tinkering on the essential feature to the overall concept of the spaceship that I had in mind.
After this pivot, it was a matter of minutes to make a new sketch.
2 About this post
For those who kept track, even though I made the breakthrough about the folding mechanism, one import part of it is still missing. The mechanism is not yet powered. That is, I still can not yet establish if I can build the spaceship with the limited supply of bricks provided by the original set of the VTOL Heavy cargo spaceship LT81.
This post will mostly deal with the example of the VTOL cargo spaceship. If you are only interested in the thinking about the design process, then you can stop reading here. It turns out that I ended up thinking that I indeed can build the alternate build with the parts of the original set. This basically means that at the end of this post, I have finished the three steps that I began with.
3 Powering the folding mechanism from the player’s perspective
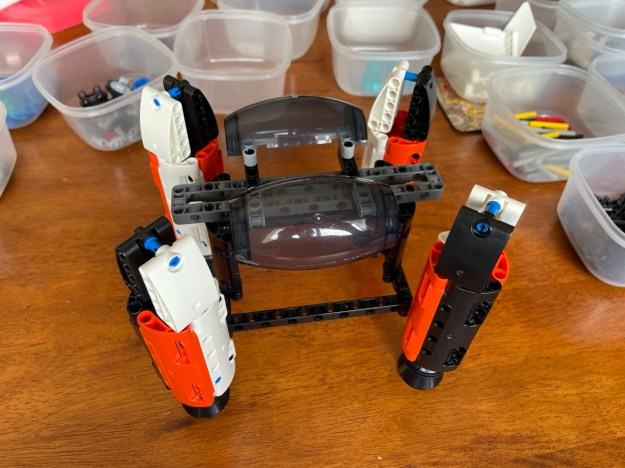
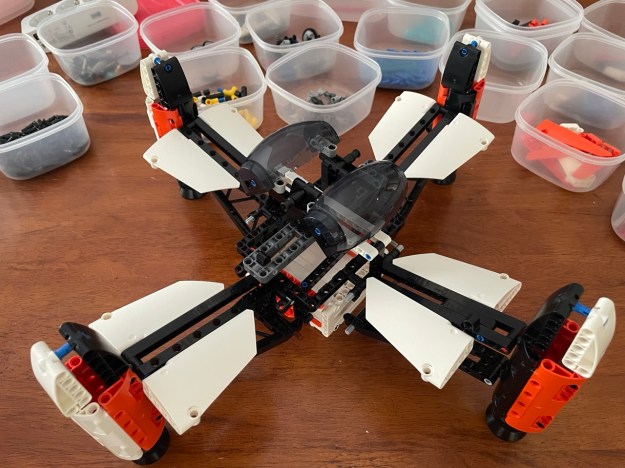
The image of Sketch version 3 above shows the spaceship in folded out position which it takes while dropping down through a planet’s atmosphere and while landing. When taking off and flying through space, the engines are folded down and closer to the ship, like in the picture to the right. For playing purposes, it seems most practical to have this as the default position. This way, swooshing it around will only require holding the spaceship but not pressing a lever or so. When landing, the player needs to press a button, or turn a wheel, or so, to fold the engine pods to their outward position. After it landed, the spaceship can stand on itself. When lifting it up, the player can either just let the engines fall to their down position, or hold the button/lever and later control the folding down.
4 Setting up a tinker frame
Tinkering on the powering of the folding mechanism directly in the sketch design is very cumbersome. There are simply too many things in the way. In addition, I did not immediately know what the powering mechanism would look like and expected a lot of trial and error. So, I decided to first build a test frame. Or perhaps tinker frame would be a better word.
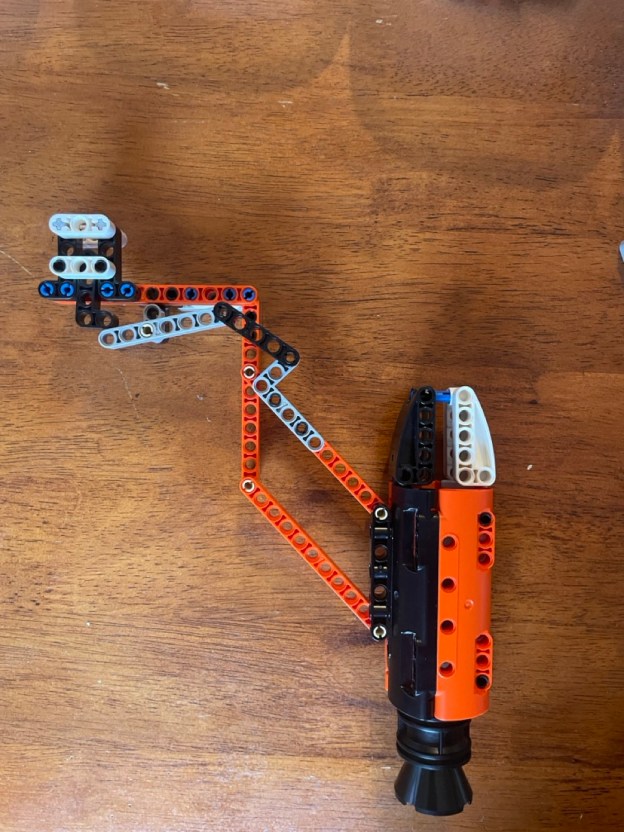
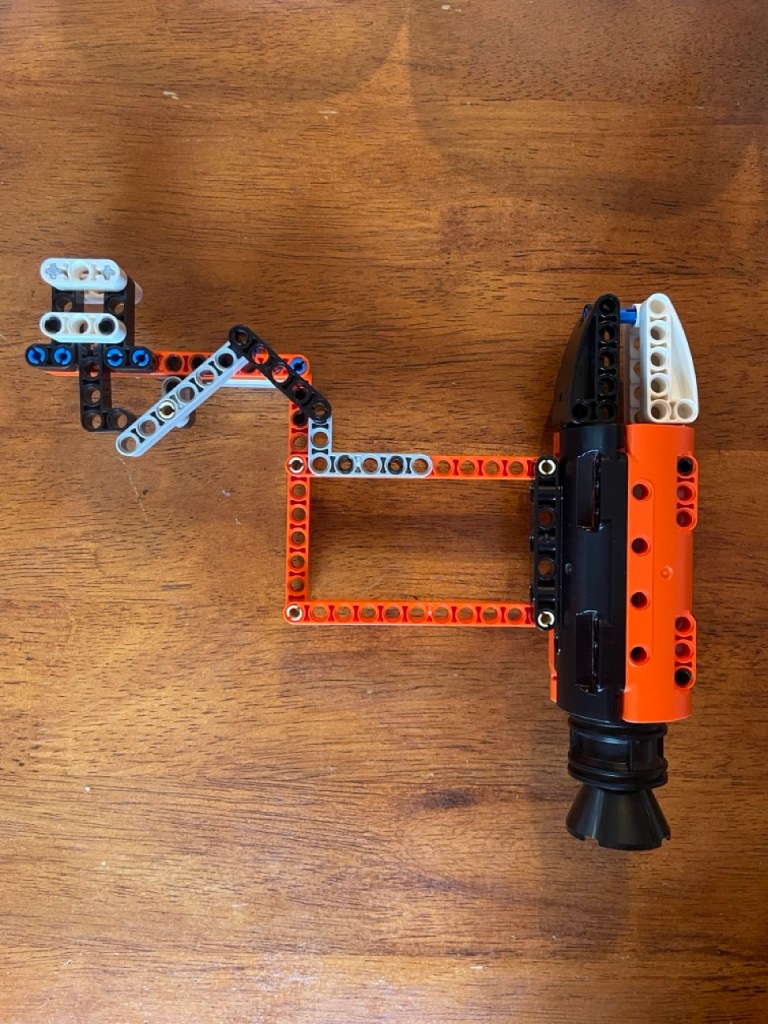
Basically, the frame represents the essential elements of the folding mechanism and the overall sketch design for just one engine pod. It looked like this.
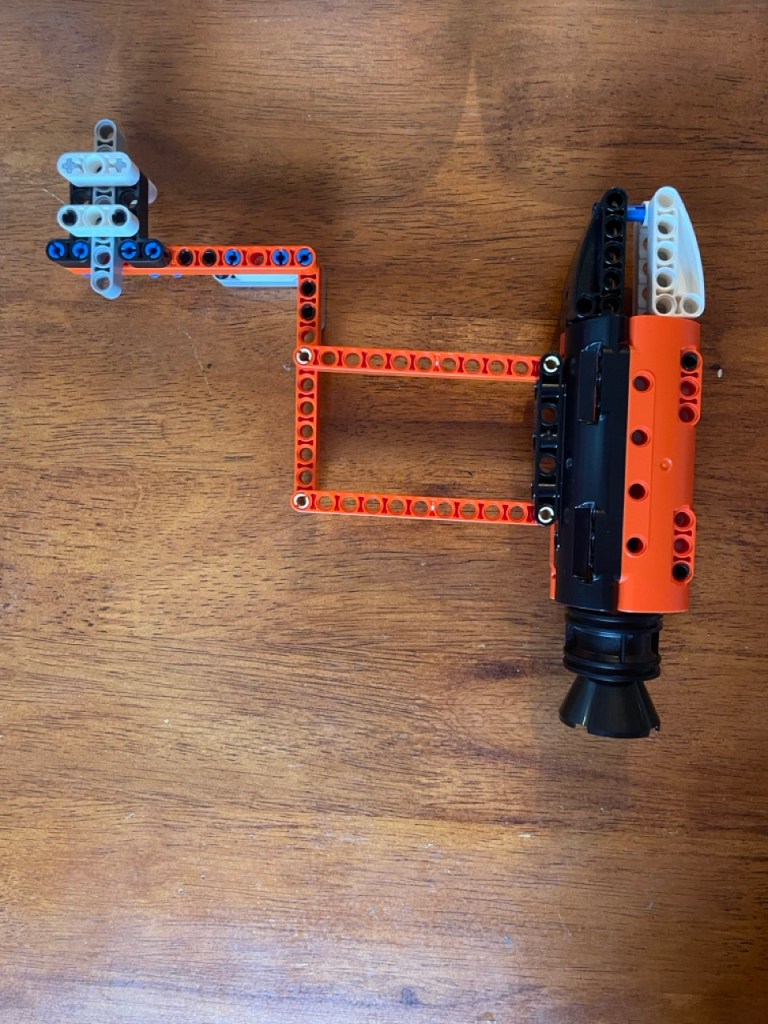
The orange bars represent the parts of the hull structure and the folding mechanism. The tan pins are the hinge points. The grey bar in the top left corner can slide up and down, and represents the button.
Do note that I wrote ‘it looks like this’! This particular version was made for the photo shoot. In actual fact, I used different versions for different attempts to make a powering mechanism. However, the size and distances between hinges and corners were the same in every version. Seen from the side, and not visible in these pictures, the frame does not exactly represent the situation of the third sketch.
For the grey button bar, I did not really think of alternatives. Instead, I immediately assumed that since the spaceship is symmetrical, the button should be in the center to most easily connect to all four engine pods in the same way. The idea is that the player pushes the button down in order to fold the engine pod up and outward ( as in the left image ).
5 Tinkering a prototype powering mechanism
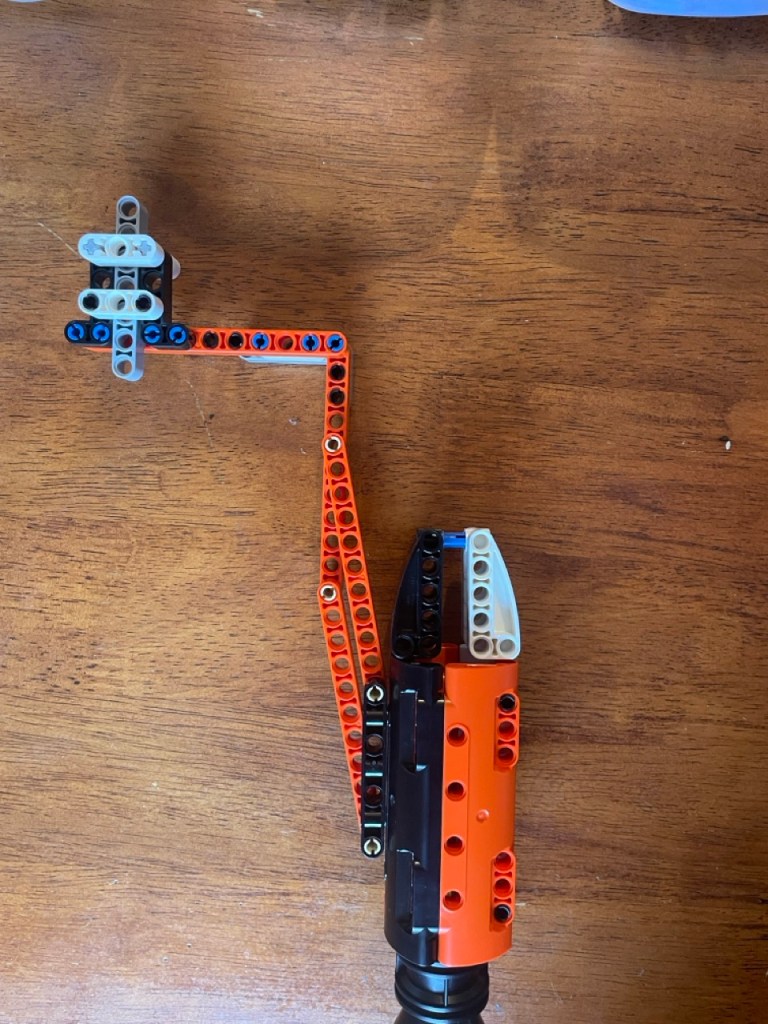
Unfortunately, I forgot to take notes and make pictures for this blog. I tried out three or four designs before I realized that I did not have enough knowledge of and experience with lever systems. Then I did an internet search and quickly found some very instructive explanations and videos. That cleared up my thinking somewhat, and I ended up with the design below.
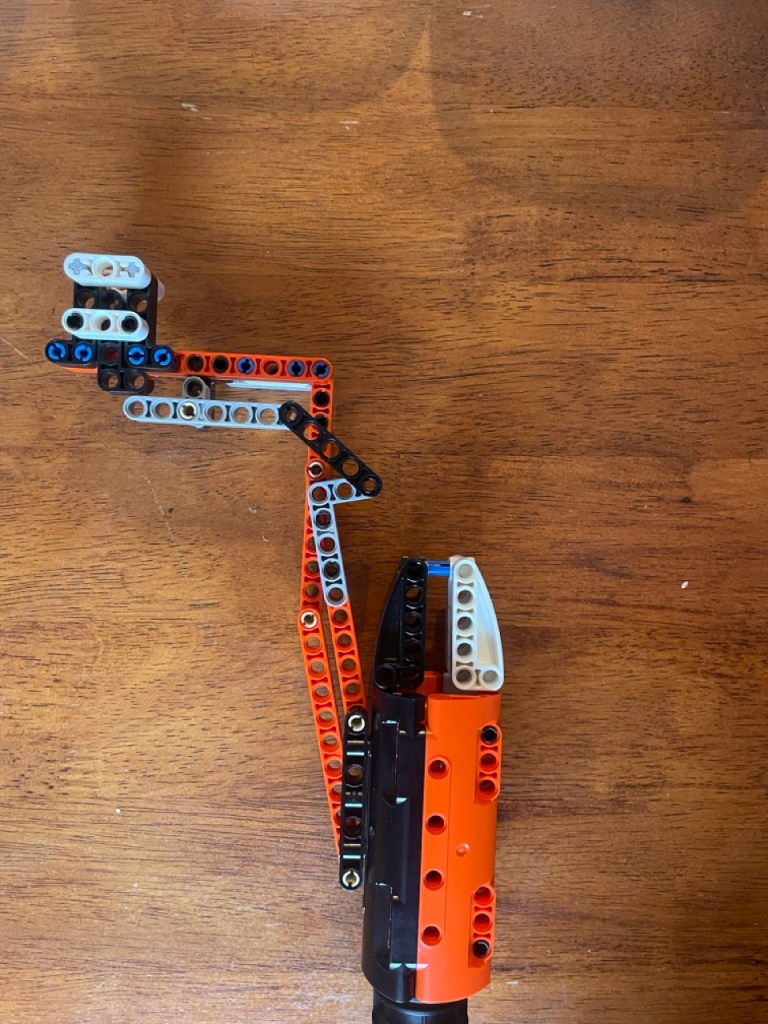
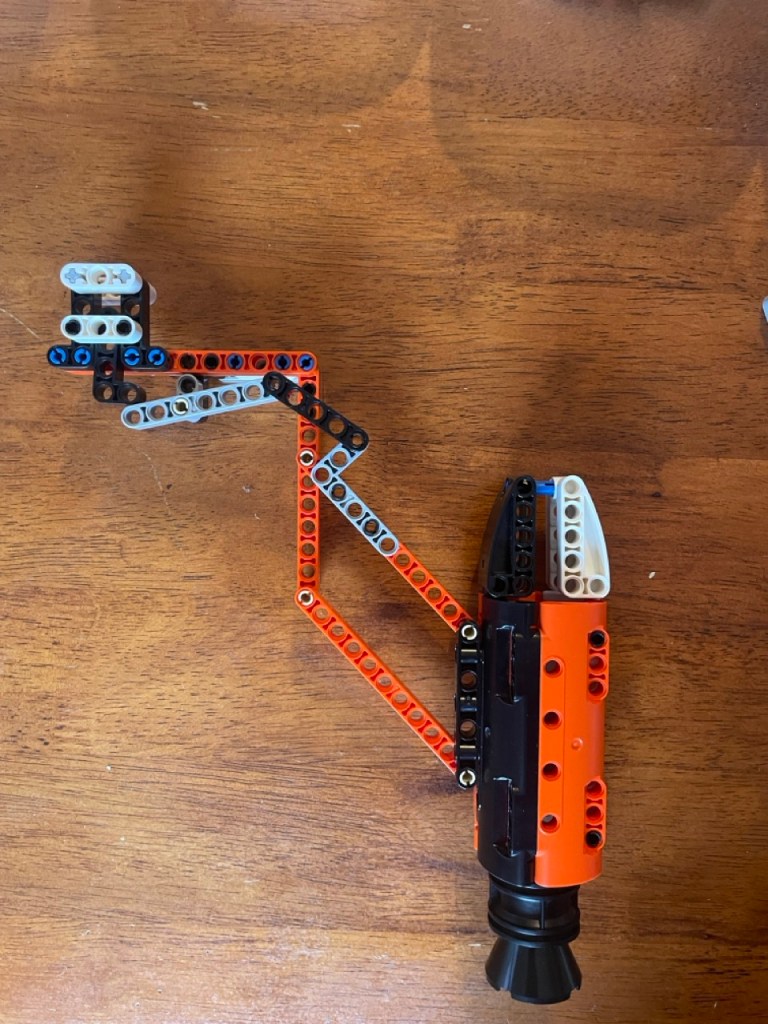

I did not manage to make it any simpler. If you do know of a different and preferably simpler mechanism, then please do let me know.
The grey button bar got replaced by the 2×4 L bar because the bar literally sits in the horizontal middle of the spaceship. It would have to drive four such mechanisms, and there would be no space enough for the bar which is just one stud square, to drive all four. The eventual button bar would thus look like a kind of plunger to drive.
6 Conclusion: the original set most likely has sufficient bricks for my idea
Except for the plunger/button, the mechanism uses only three bricks, and fortunately the original set contains at least four copies of each. Implementing the prototype powering mechanism into the sketch model will probably be a puzzle and may involve some re-engineering of both.
Besides that, there is still a lot of other work to do before the MOC is finished. But there also are a lot of so far unused bricks left in the original set. Do I know for sure that those will be sufficient? Yes, because if there are too few for a particular feature, I can improvise, or simply leave out the feature and still have a good enough MOC. Not perfect, but definitely good enough.
This means that I now feel confident that the original set has sufficient bricks to implement all the essential features. The sketch versions also have shown that the original set contains sufficient bricks to bring all features together into a whole MOC.
In turn, the previous means that I now have passed all the steps that I claimed ( in the first post of this series ) are needed to get started on an alternate build:
- A limited supply of bricks provided by an original LEGO set
- An idea of what to build, including a list of essential features
- Check that the essential features can be made with the limited supply
- Check that the essential features can be composed into a whole MOC at the same scale
Frank van der Most, 5 June 2026
