MOC manual service. Get a step-by-step manual of your MOC.
Click here to learn more.
1 Recap
You can skip this if you have read the previous posts.
Over a week ago, I started making an alternative build ( alt build ) for the VTOL Heavy cargo spaceship LT81 ( in this post, I refer to it as the original set ), and I decided to explain how I think making an alt build starts. It maybe helpful for those who do not know how to start, and it helps me reflecting on how I work and hopefully improve, perhaps with your comments. You can follow the steps and the thinking even if you are not interested in Technic or spaceships. That is just the example.
The take away from the first post is that you need to compare your idea(s) for an alt build with the limited supply of bricks that are available in the set that you are making the alt build from. This may be a simple job, but for bigger or more complex MOCs it may not be so. You may even have to build essential features of your idea in order to find out.
For my idea for a cargo spaceship, I indeed should first work on an essential feature. However the next day, I got quickly sidetracked. I started making a sketch model of the entire ship, and I got a cool idea for a new feature.
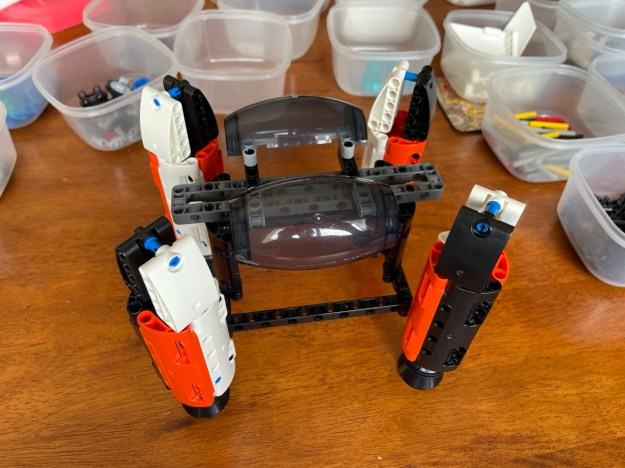
All images in this post can be clicked for a full screen version
On the third day, I actually started making the essential feature. That feature is a folding mechanism, so that the ship can land, lower itself over the cargo so that the cargo gets stored inside the spaceship, and then lift off. Inspired by the folding mechanism for the landing gear of the original set, I also wanted to use a folding mechanism for the lowering over the cargo. I discovered a mayor snag with this feature. I tried out different designs for it, and asked you, my dear reader, for your solutions.
2 About this post
In this post, the struggle to design a folding mechanism continues. Spoiler, I did not get it working, not even with your help. But I did manage to reach a breakthrough. Moreover I learned a new way of getting unstuck in my head.
This post will mostly deal with the example of the VTOL cargo spaceship. If you are only interested in the thinking about the design process, then better start reading at Chapter 5.
3 Folding mechanism version 3.2
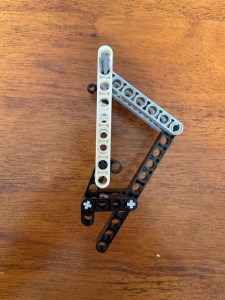
My last post ended with the conclusion that version 3 of the folding mechanism could do with more tinkering. I had this, the picture below left. It did not work so well because the 4×2 black bars were not stacked right, so one of them got in the way of the 11 stud black bar, and the one stud sticking out was not helping either. So I made a different version, which you see below to the right
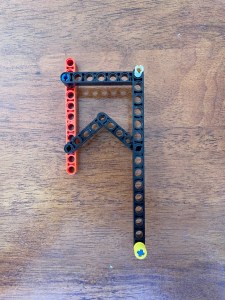
This version 3.1 gives a lot of flexibility. The end of the 15 stud bar ( with the yellow bush ) can move freely over a large area, both up and down and left and right. Which means that it can also move straight up and down along a ‘vertical’ line, as the following series shows. I mounted version 3.2 on the 11×15 frame of the original set, and added the white bars to show some of the vertical lines that the yellow tip can follow.
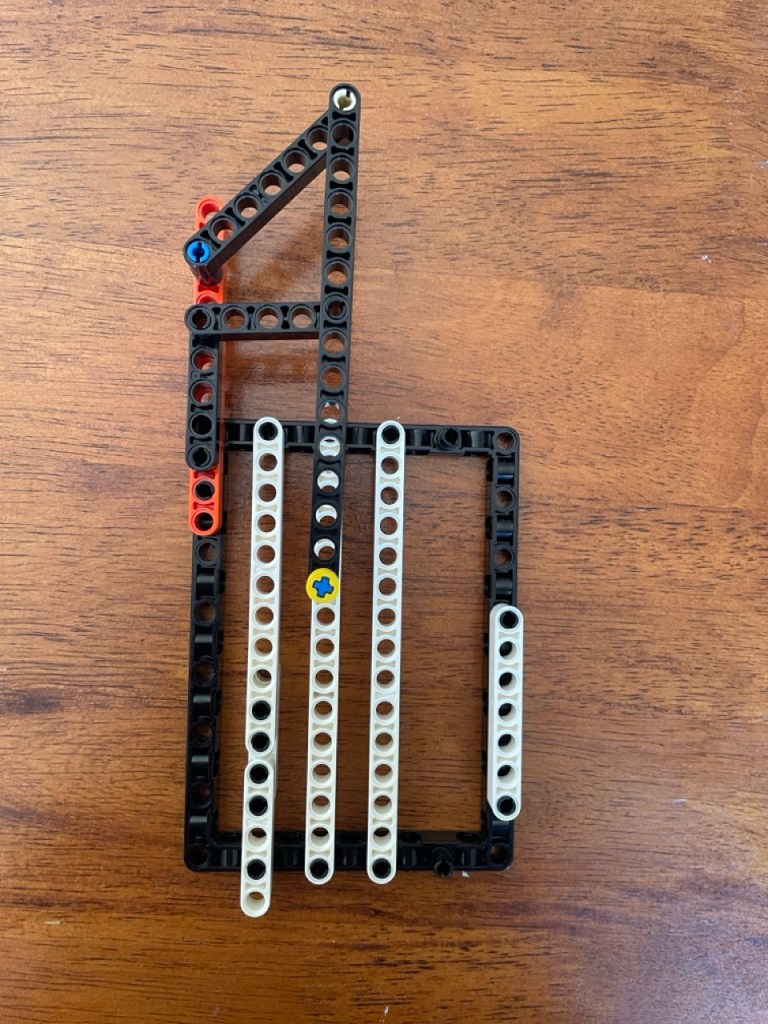
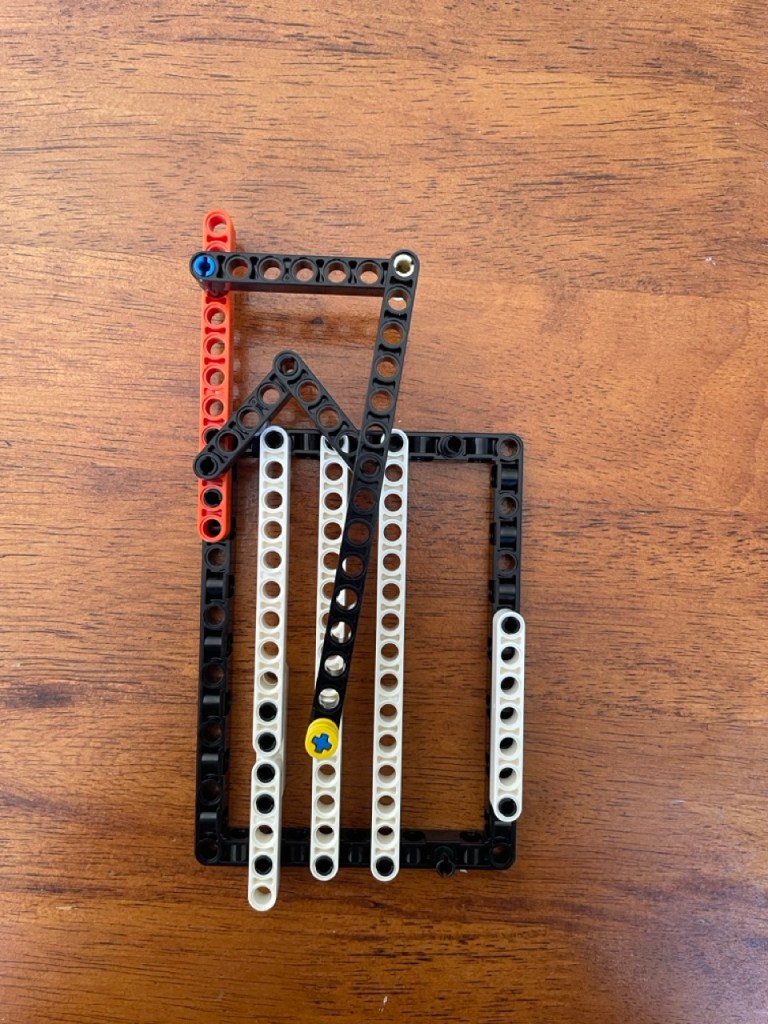
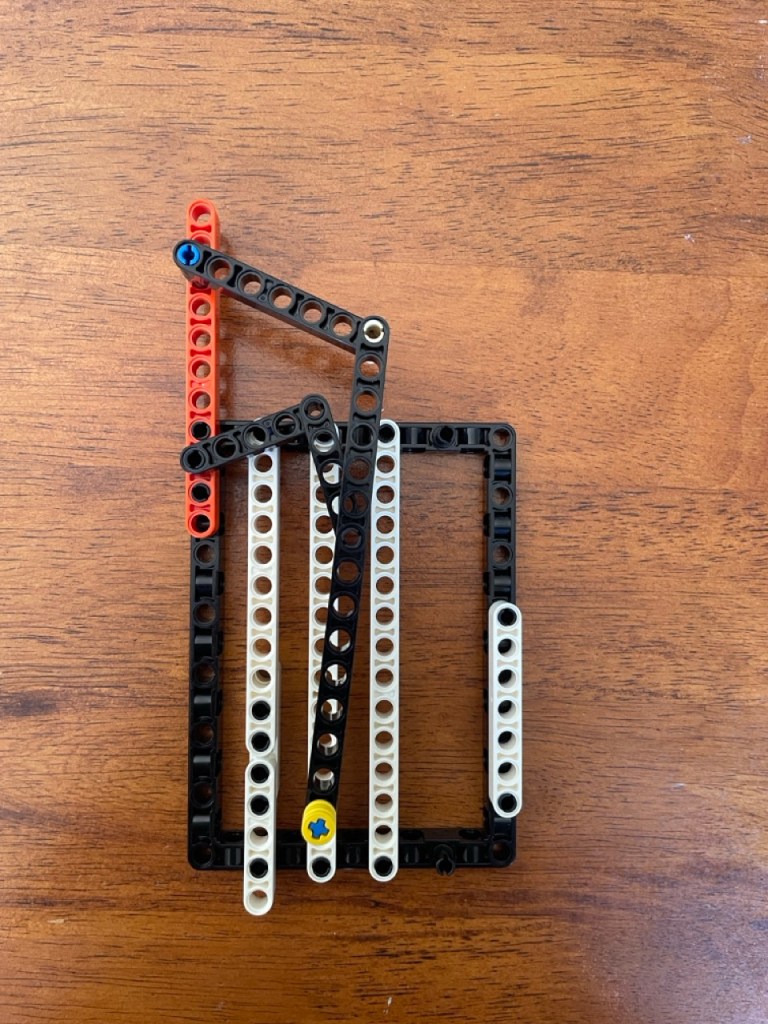
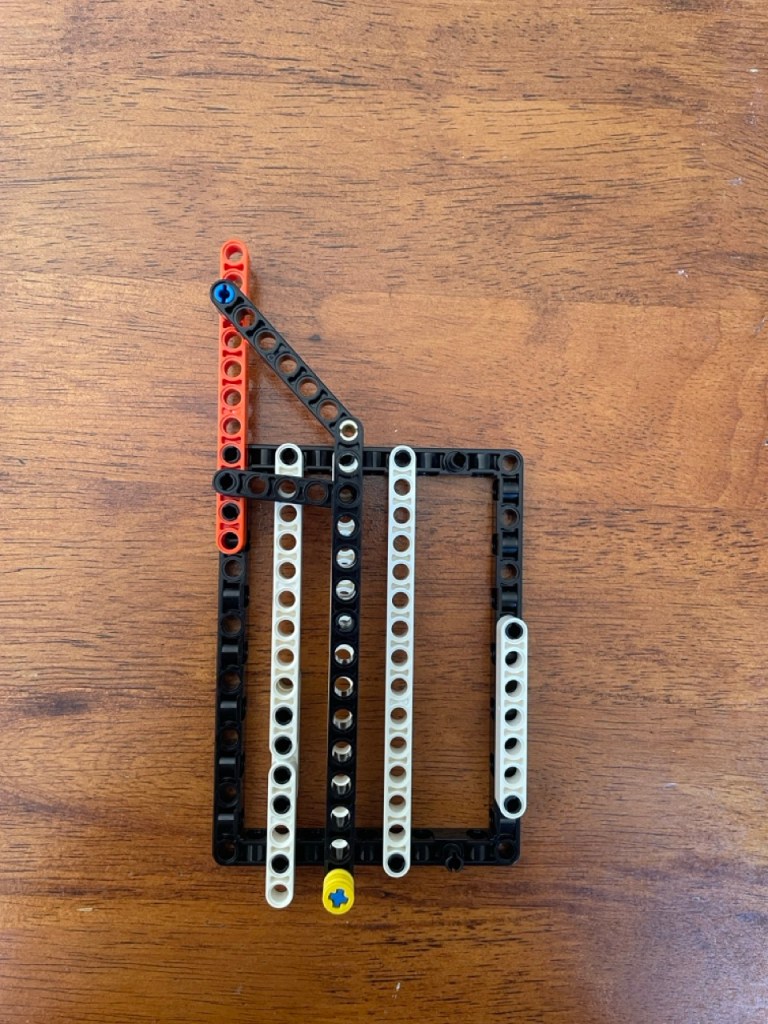
The nice part of the above series is that the 15 studs black bar is exactly vertical in the first and last image, and close to vertical in the middle ones. So if this can be made to work, then the movement of the engine pod will be quite acceptable, at least to me.
The next question to answer is how this can be powered. It will not be enough to power only the top 7 stud bar ( the actual lever ) because then the yellow tip of the 15 stud bar can still move left and right. At least the left 5 stud bar needs powering as well. Moreover, it needs to be synchronized to the movement of the 7 stud lever.
The most elegant solution would be to connect the two with a single bar. I would have to be able to find two pin holes, one on each of the bars, whose distance remains the same throughout the entire swing of the 7 and 5 stud bars. Unfortunately, they do not exist, or at least, I did not find them.
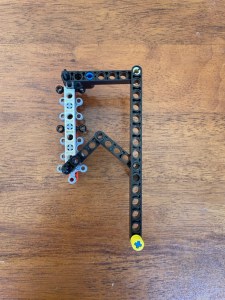
The second solution that I could come up with was to synchronize the two bars with gears. I noticed that the 7 and 5 stud bars rotate at almost exactly the same speed. That is, if one turns say 15 degrees, the other does almost the same. Of course, the devil is in the ‘almost’ part, but I figured, let just wait and see what happens if they rotate at exactly the same speed. I came up with version 3.2 ( to the right )
When connected to the test frame, the following happened upon turning the 7 stud bar.
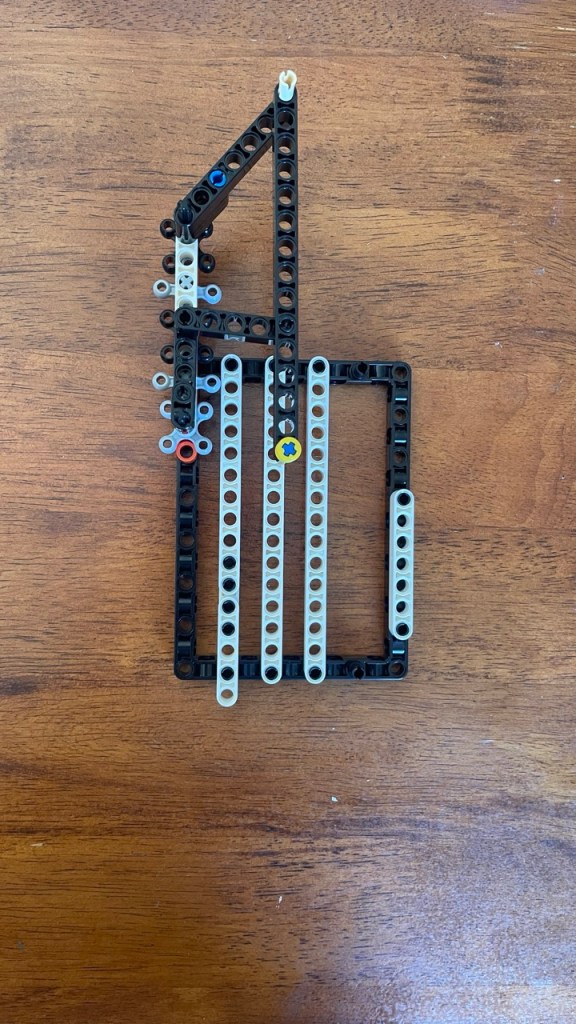
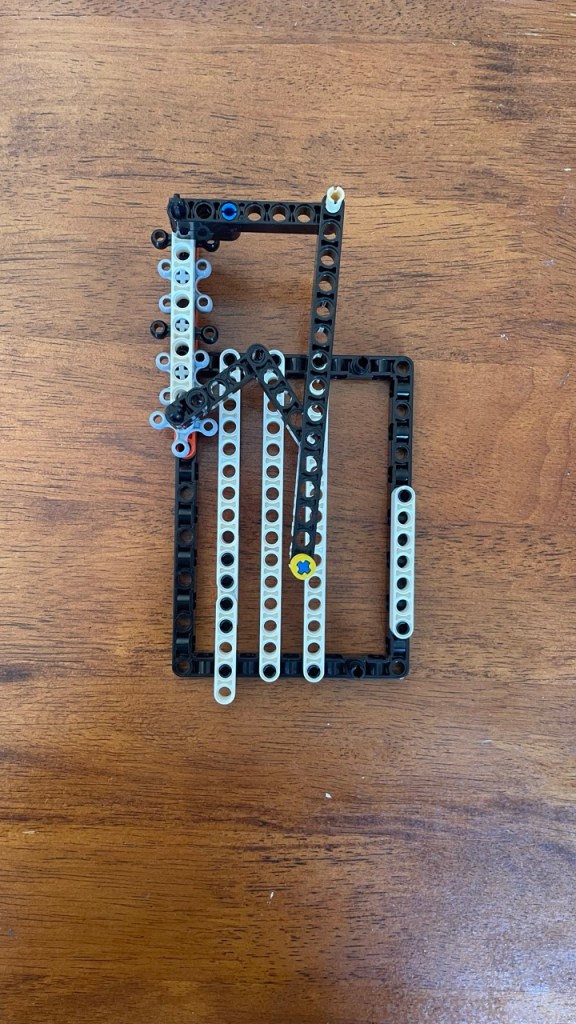
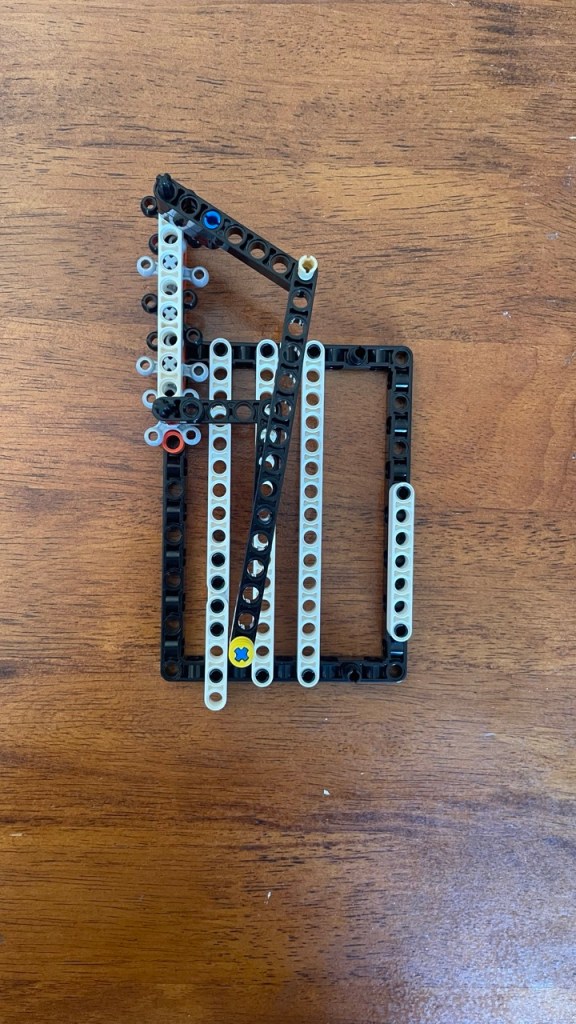
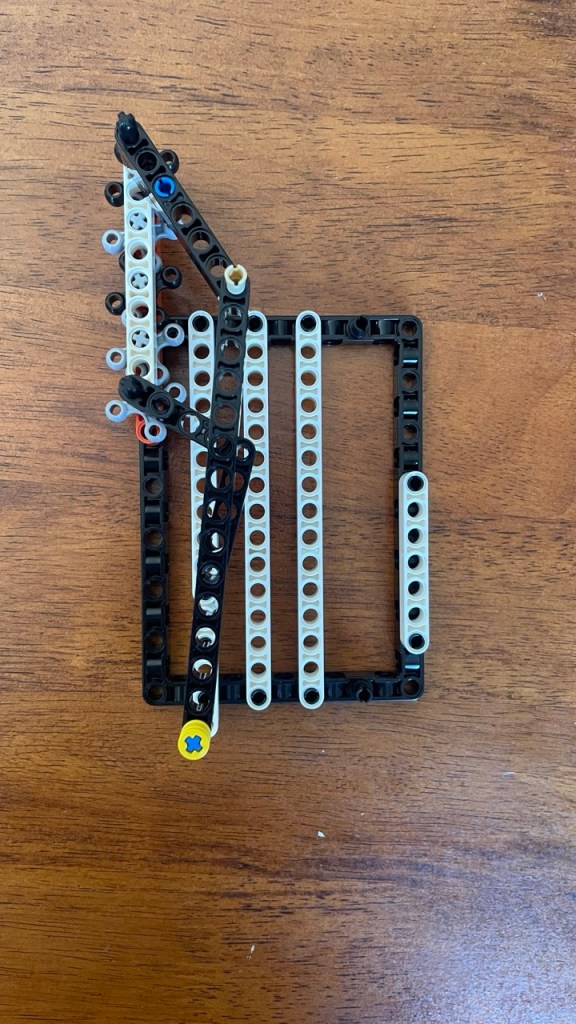
As you can see, the yellow tip of the 15 stud bar does not follow a straight line. Too bad, but for the alternate build. It would not have been a viable solution anyways, because the original set only has six of these gears. Also, on the plus side, it would require some calculation and/or trial-and-error but it should be possible to improve the gear system so that the upper and lower level do turn at the right speeds. And, it could in principle also be a solution to power version 5 ( see the previous post ).
At this point, I consider that version 3 of the folding mechanism is not viable either for the alternate build. Fortunately, you came up with some ideas.
4 Your ideas
The previous post, in which I asked for your help, was announced on Reddit and on Rebrickable. On Reddit, the post got a few upvotes, on Rebrickable, people responded with comments.
Thank you to all commenters for your help and encouragement!
GoldDeer Bricks and etaleTechnic both suggested to use a sliding mechanism, rather than folding. etale Technic suggested to not use friction. Only if all else fails, I will go for sliding, because I really do want something folding.
Lupine technology proposed to make it an alt build of two different sets. That would definitely solve any lack of bricks problems. However, for the time being I am going to stick to an alternate build of just one set. In part because I see it as a bigger challenge, and in part because fewer people will be able to build the MOC.
faint_range14 gave a whole bunch of suggestions. Firstly, keep the engine pods separate from the landing gear, so that I do not need to worry about the engines being angled wrongly. Secondly, and if I understand correctly, use the engines as four different ‘cranes’ to lift four smaller pieces of cargo, instead of one big one. Thirdly, use a scissor mechanism to lift the whole ship. Fourthly, attach wheels to the engine pods.
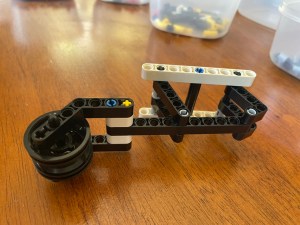
Of these four, I like the first and the last one best because they are such simple solutions, especially when taken together. I do want to stick to only one cargo container, and I don’t think there are enough bricks for a scissor mechanism. However, I am going to try out a variety of the scissor mechanism. For starters, here is the original set’s basic landing gear, with a wheel instead of a ski. It is super robust, but the set does not have enough bricks to make three or four copies.
Here is an idea for a scissor mechanism based landing gear. It looks ridiculous and it is not very strong. However, the sliders work nicely, and the mechanism can overshoot and lock in place. In principle, I see how it could be powered, but the set only allows for two copies of that.
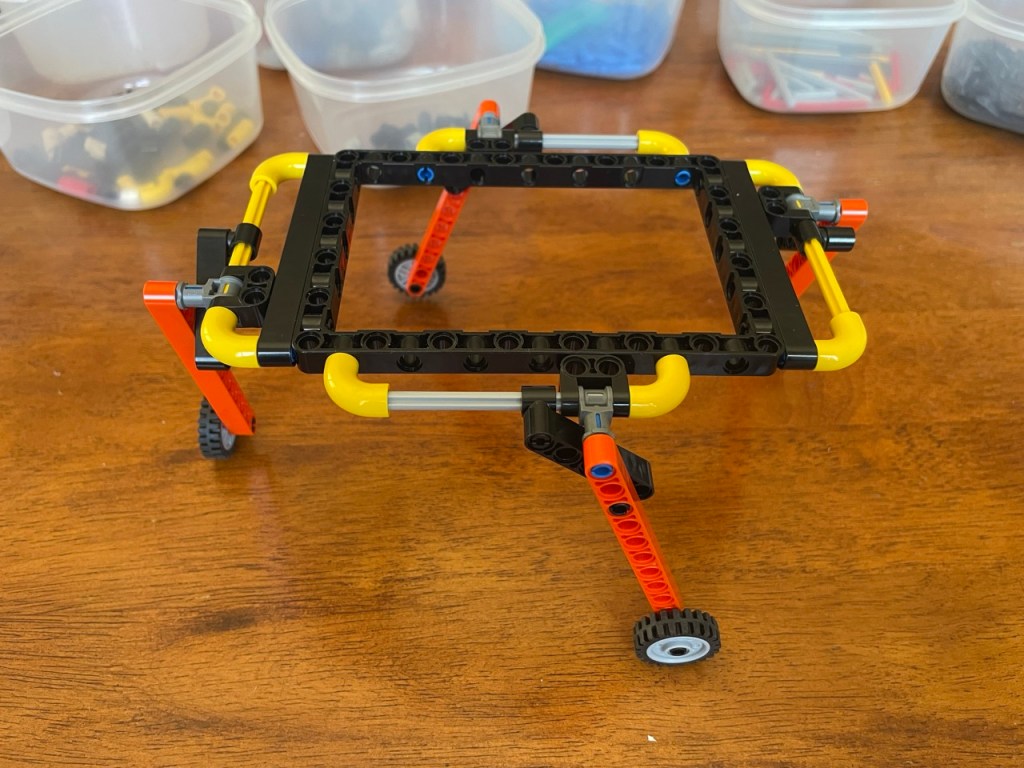
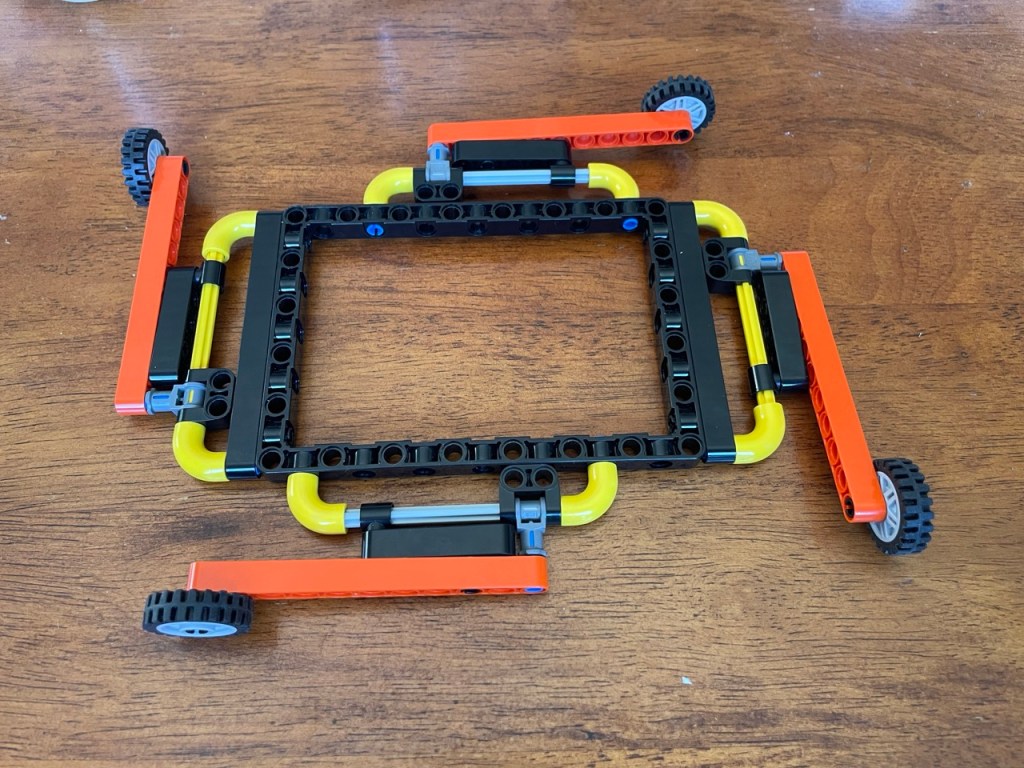
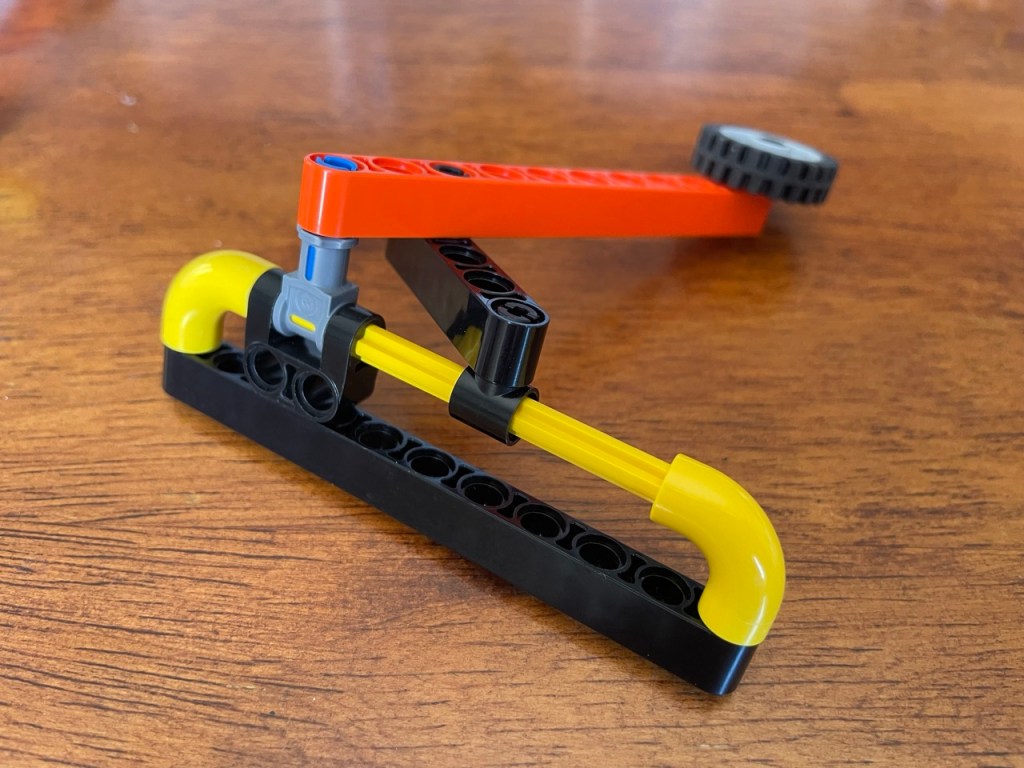
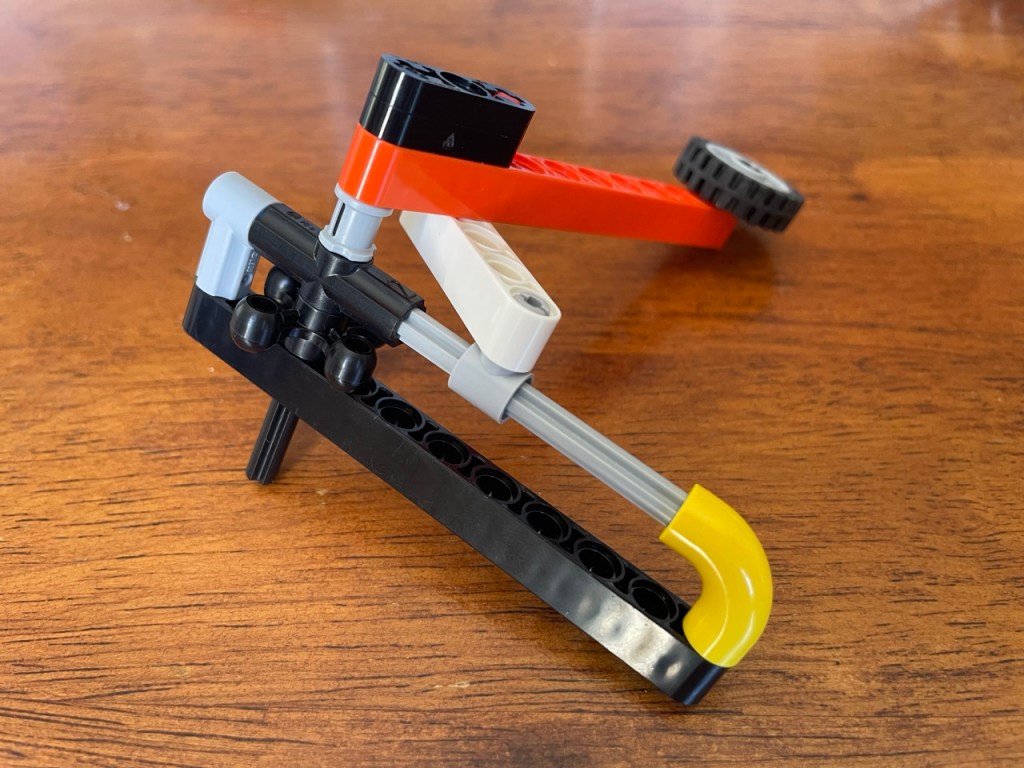
In spite of all the suggestions, I am still not seeing a viable road for a folding mechanism. It is time to start thinking differently.
5 Pivoting to force a breakthrough
For those who lost track or just jumped in here, what I am trying to do is to find out if the original set has sufficient bricks to make one of the ‘essential features’ that I defined for my alternate build. Since the feature can not be made with a single brick, I had to start designing and building it to get an idea. In the case of my idea, that turned out not to be easy, and up to this point, I did not get it done. That is, to me there were a few acceptable ( if not cool ) designs, but the original set does not have sufficient bricks to build them.
5.1 If tinkering does not solve a problem
During my days as a programmer, I discovered that solving a technical problem usually gets me to focus on the problem. That sounds like a no-brainer, but it is not. It means that I ended up zooming in on details and tinkering with alternatives, just like I did with this essential feature. This often leads to a solution. But sometimes it does not. If after a handful of attempts, I still could not solve a problem, I eventually learned to zoom out. By zooming out, one looks at how the context frames the problem and how it limits the range of possible solutions. Changing that context may then open up new and perhaps simple solutions to the problem at hand.
With MOC design that means changing the bricks that surround ( either nearby or further away ) the problem, so that the problem is somewhat changed and open to other possible solutions. It does not guarantee a solution, but it provides a way forward, and it may suddenly be simple to solve the problem.
5.2 If zooming out does not work
In this particular case, there was however no context, at least not in terms of bricks. After all, I was just designing an implementation for an essential feature. There hardly was a context. There were two sketches, but those would not even have been able to hold the essential feature.
I was about to conclude that I can not make the essential feature with the bricks of the original set. Even though, I know that it is okay to abandon an essential feature ( or any idea ), I still could not let it go. And while I was working on the last version of it, it suddenly occurred to me that I could zoom out even further to the overall concept of my alternate build. I could have a chance at keeping the folding mechanism, if I reconsidered what role it plays in my alternate build. I now need to talk about the spaceship again to illustrate this.
5.3 Rethinking the overall concept – the example of the VTOL cargo spaceship
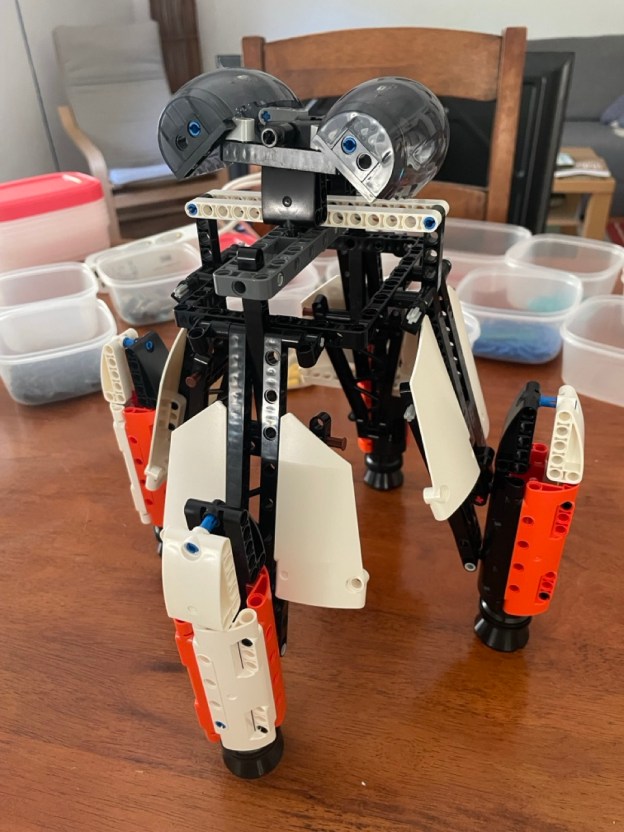
My initial idea was that the spaceship would land on top of its cargo that is waiting on the ground. It would then lower itself over the cargo and that way insert it into it’s cargo hold. After that, it could launch itself into space again.
In one of the previous posts, I already ridiculed that idea. If Space X can already now land a booster rocket on a platform on the ground, would it not be possible in some future that a spaceship can land on a spot exactly to the centimeter? Of course that could be possible. So why does my spaceship need the folding mechanism at all?
Well, it does not for this reason. But I still want it to have this folding mechanism, so I just need to come up with another reason. Okay, what about, it needs it to create drag when it is descending into an atmosphere, and it needs it for better maneuvering? After all, if the engines are further apart from each other, then it is easier to keep the ship horizontal and move it left and right. Just like with the current day drones.
So, the ship does not fold while on the ground, but in the air or in space. Breakthrough! If that changes then I do not need to worry about the changing of the distance between the engines and the hull when the ship folds itself over its cargo.
Once, I got that thought, it was easy to come up with a new sketch.
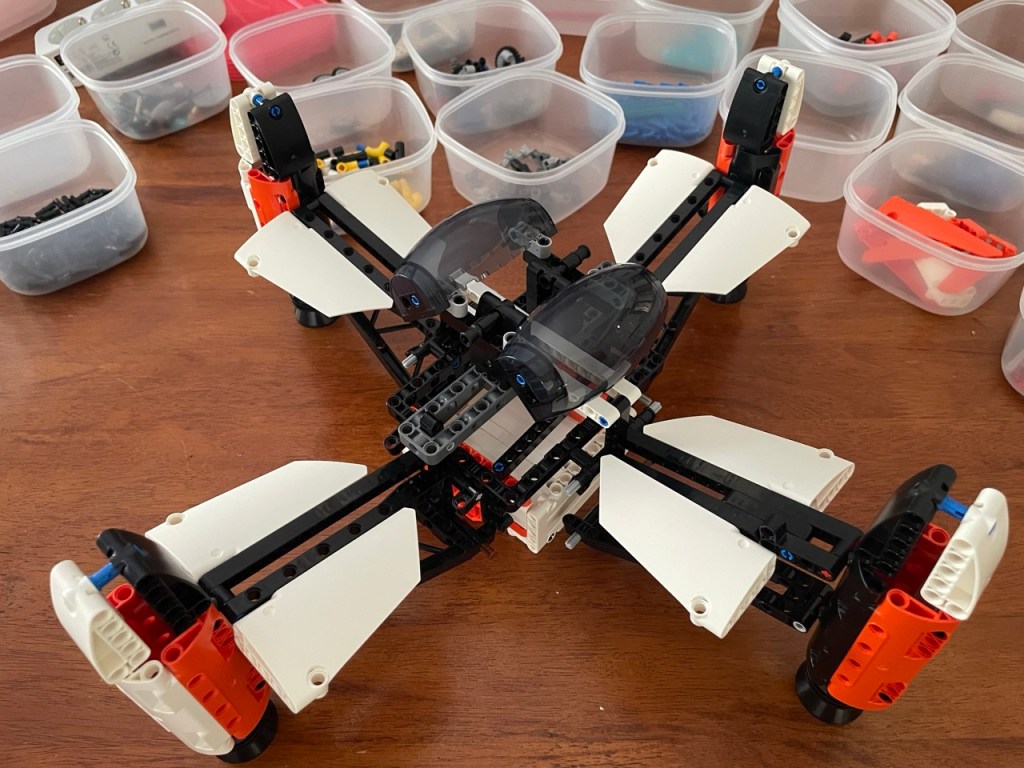
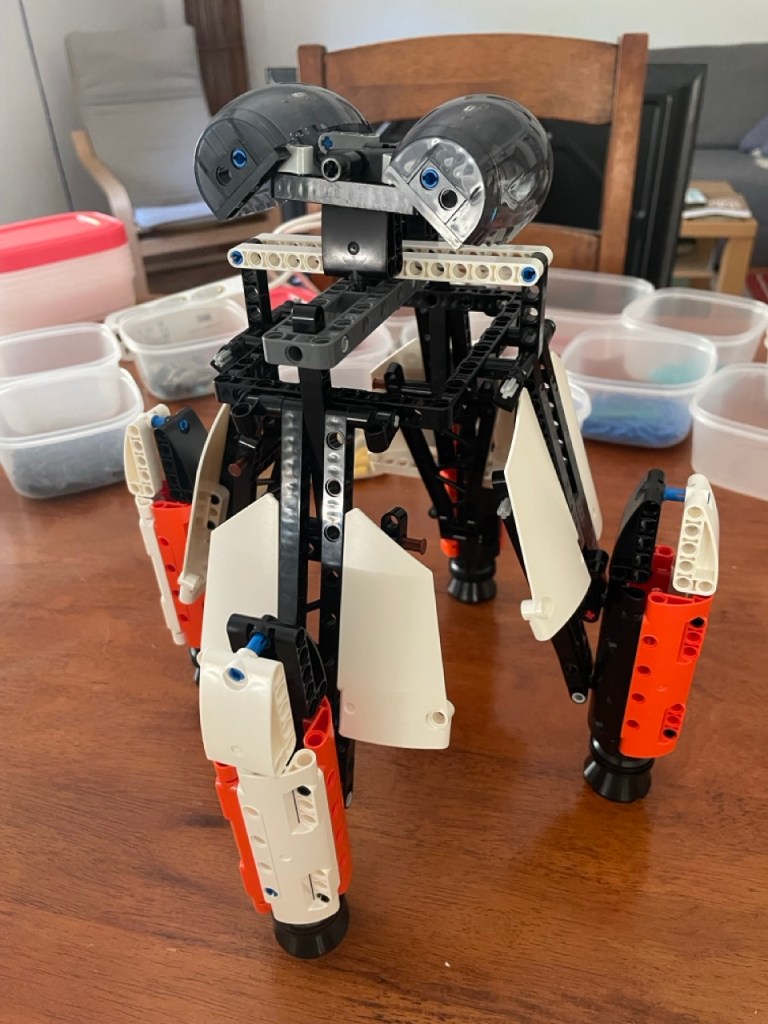
End of the nerd talk about the spaceship
6 Concluding. Pivoting, but around what?
In bullet points, the previous and current posts have boiled down to the following.
- To design an alternate build of some size based on an existing set, you need to check sooner or later, implicitly or explicitly, if the existing set has enough bricks to build what you want.
- A part of that is checking if the essential features of your design can be made. For bigger features, you may have to build them to find out and likely try out different versions. There are different strategies:
A) Come up with ideas. try out. tinker. focus on the feature
B) Ask others for ideas
C) Zoom out to the features context ( if it already exists )
- If none of the different versions work. You have multiple options:
A) Keep banging your head
B) Drop the essential feature
C) Zoom out to rethink the overall concept
What I learned from writing these posts is that, solving problems to reach my goal of designing an alternate build requires flexibility of thinking. Everything can be adjusted and rethought. The trick seems to be to decide what I really want to keep, i.e. what you do not want to be flexible about, and pivot the rest around that.
In my case, I really wanted to keep the folding mechanism. I could not drop it ( 3B ) and I did not want to continue banging my head on different versions ( 3A ).
Now that I wrote the options down as a summarizing list, it seems as if option 3C had always been part of my method. Now it is, but before today, it was not. I invented the option as a way out. Since it is now part of the list, next time, it will not take me as long before trying out 3C.
Having the essential features covered, I can continue with the last part of the check, which is to see if all features can be integrated into a whole at the right scale within the limited supply of bricks of the original set. I am not sure if that warrants another blog post though.
Frank van der Most, 26 May 2026


ooo
LikeLiked by 1 person
I really like 3c. Thanks for sharing your thinking.
LikeLiked by 1 person
You are most welcome! Thank you for making the effort to comment!
LikeLike